- 1
- 2
- 3
- 4
- 5
- 6
- 7
- 8
- 9
- 10
- 11
- 12
- 13
- 14
- 15
- 16
- 17
- 18
- 19
- 20
- 21
- 22
- 23
- 24
- 25
- 26
- 27
- 28
- 29
- 30
- 31
- 32
- 33
- 34
- 35
- 36
- 37
- 38
- 39
- 40
- 41
- 42
- 43
- 44
- 45
- 46
- 47
- 48
- 49
- 50
- 51
- 52
- 53
- 54
- 55
- 56
- 57
- 58
- 59
- 60
- 61
- 62
- 63
- 64
- 65
- 66
- 67
- 68
- 69
- 70
- 71
- 72
- 73
- 74
- 75
- 76
- 77
- 78
- 79
- 80
- 81
- 82
- 83
- 84
- 85
- 86
- 87
- 88
- 89
- 90
- 91
- 92
- 93
- 94
- 95
- 96
- 97
- 98
- 99
- 100
- 101
- 102
- 103
- 104
- 105
- 106
- 107
- 108
- 109
- 110
- 111
- 112
- 113
- 114
- 115
- 116
- 117
- 118
- 119
- 120
- 121
- 122
- 123
- 124
- 125
- 126
- 127
- 128
- 129
- 130
- 131
- 132
- 133
- 134
- 135
- 136
- 137
- 138
- 139
- 140
- 141
- 142
- 143
- 144
- 145
- 146
- 147
- 148
- 149
- 150
- 151
- 152
- 153
- 154
- 155
- 156
- 157
- 158
- 159
- 160
- 161
- 162
- 163
- 164
- 165
- 166
- 167
- 168
- 169
- 170
- 171
- 172
- 173
- 174
- 175
- 176
- 177
- 178
- 179
- 180
- 181
- 182
- 183
- 184
- 185
- 186
- 187
- 188
- 189
- 190
- 191
- 192
- 193
- 194
- 195
- 196
- 197
- 198
- 199
- 200
- 201
- 202
- 203
- 204
- 205
- 206
- 207
- 208
- 209
- 210
- 211
- 212
- 213
- 214
- 215
- 216
- 217
- 218
- 219
- 220
- 221
- 222
- 223
- 224
- 225
- 226
- 227
- 228
- 229
- 230
- 231
- 232
- 233
- 234
- 235
- 236
- 237
- 238
- 239
- 240
- 241
- 242
- 243
- 244
- 245
- 246
- 247
- 248
- 249
- 250
- 251
- 252
- 253
- 254
- 255
- 256
- 257
- 258
- 259
- 260
- 261
- 262
- 263
- 264
- 265
- 266
- 267
- 268
- 269
- 270
- 271
- 272
- 273
- 274
- 275
- 276
- 277
- 278
- 279
- 280
- 281
- 282
- 283
- 284
- 285
- 286
- 287
- 288
- 289
- 290
- 291
- 292
- 293
- 294
- 295
- 296
- 297
- 298
- 299
- 300
- 301
- 302
- 303
- 304
- 305
- 306
- 307
- 308
- 309
- 310
- 311
- 312
- 313
- 314
- 315
- 316
- 317
- 318
- 319
- 320
- 321
- 322
- 323
- 324
- 325
- 326
- 327
- 328
- 329
- 330
- 331
- 332
- 333
- 334
- 335
- 336
- 337
- 338
- 339
- 340
- 341
- 342
- 343
- 344
- 345
- 346
- 347
- 348
- 349
- 350
- 351
- 352
- 353
- 354
- 355
- 356
- 357
- 358
- 359
- 360
- 361
- 362
- 363
- 364
- 365
- 366
- 367
- 368
- 369
- 370
- 371
- 372
- 373
- 374
- 375
- 376
- 377
- 378
- 379
- 380
- 381
- 382
- 383
- 384
- 385
- 386
- 387
- 388
- 389
- 390
- 391
- 392
- 393
- 394
- 395
- 396
- 397
- 398
- 399
- 400
- 401
- 402
- 403
- 404
- 405
- 406
- 407
- 408
- 409
- 410
- 411
- 412
- 413
- 414
- 415
- 416
- 417
- 418
- 419
- 420
- 421
- 422
- 423
- 424
- 425
- 426
- 427
- 428
- 429
- 430
- 431
- 432
- 433
- 434
- 435
- 436
- 437
- 438
- 439
- 440
- 441
- 442
- 443
- 444
- 445
- 446
- 447
- 448
- 449
- 450
- 451
- 452
- 453
- 454
- 455
- 456
- 457
- 458
- 459
- 460
- 461
- 462
- 463
- 464
- 465
- 466
- 467
- 468
- 469
- 470
- 471
- 472
- 473
- 474
- 475
- 476
- 477
- 478
- 479
- 480
- 481
- 482
- 483
- 484
- 485
- 486
- 487
- 488
- 489
- 490
- 491
- 492
- 493
- 494
- 495
- 496
- 497
- 498
- 499
- 500
- 501
- 502
- 503
- 504
- 505
- 506
- 507
- 508
- 509
- 510
- 511
- 512
- 513
- 514
- 515
- 516
- 517
- 518
- 519
- 520
- 521
- 522
- 523
- 524
- 525
- 526
- 527
- 528
- 529
- 530
- 531
- 532
- 533
- 534
- 535
- 536
- 537
- 538
- 539
- 540
- 541
- 542
- 543
- 544
- 545
- 546
- 547
- 548
- 549
- 550
- 551
- 552
- 553
- 554
- 555
- 556
- 557
- 558
- 559
- 560
- 561
- 562
- 563
- 564
- 565
- 566
- 567
- 568
- 569
- 570
- 571
- 572
- 573
- 574
- 575
- 576
- 577
- 578
- 579
- 580
- 581
- 582
- 583
- 584
- 585
- 586
- 587
- 588
- 589
- 590
- 591
The module configuration Menu for the online shop {SEO-Shop}, OpenCart 2.x, 3.x, ocStore
-
Installing the “NeoSeo Menu” module.
To install the module“NeoSeo Menu” For OpenCart you need:
- Go to the site administration panel and select the section “Add-ons”->”Modules”:

- In the list of modules that opens, select “NeoSeo Menu” and click on the button “Install”:

- Go to “Add-ons”->”Add-ons Manager” and click on the “Update” button in the window that opens.

This completes the installation of the module and you can proceed to editing the module settings.
-
Edit module settings.
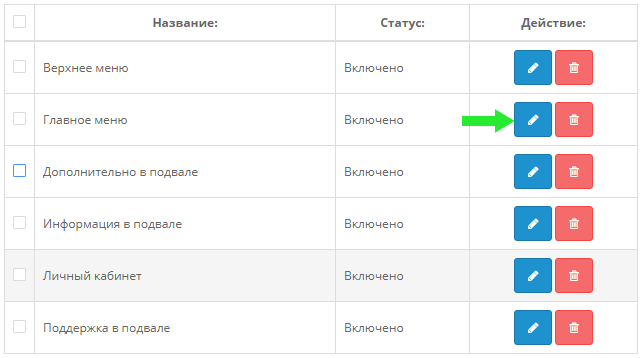
To edit module settings, go to the site's admin panel and select the “Add-ons”->”Modules” section. In the list of modules that opens, select “NeoSeo Menu” and click on the “Edit”:
After that, a window for editing module settings will appear on the screen: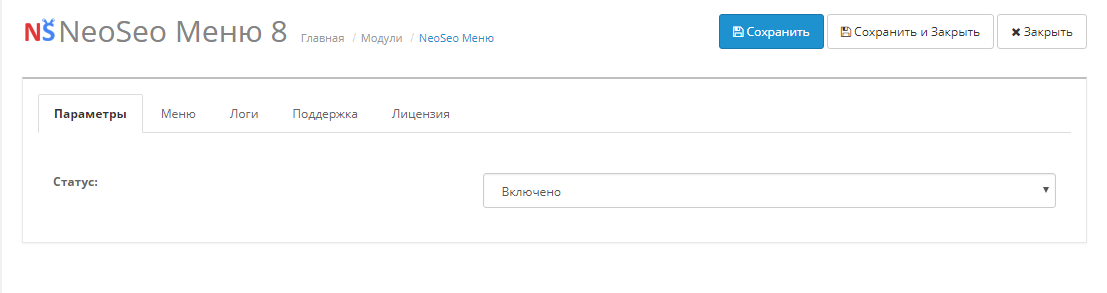
 The “Parameters” tab is intended for setting the following parameters:
Status. Switch that is designed to enable or disable the module:
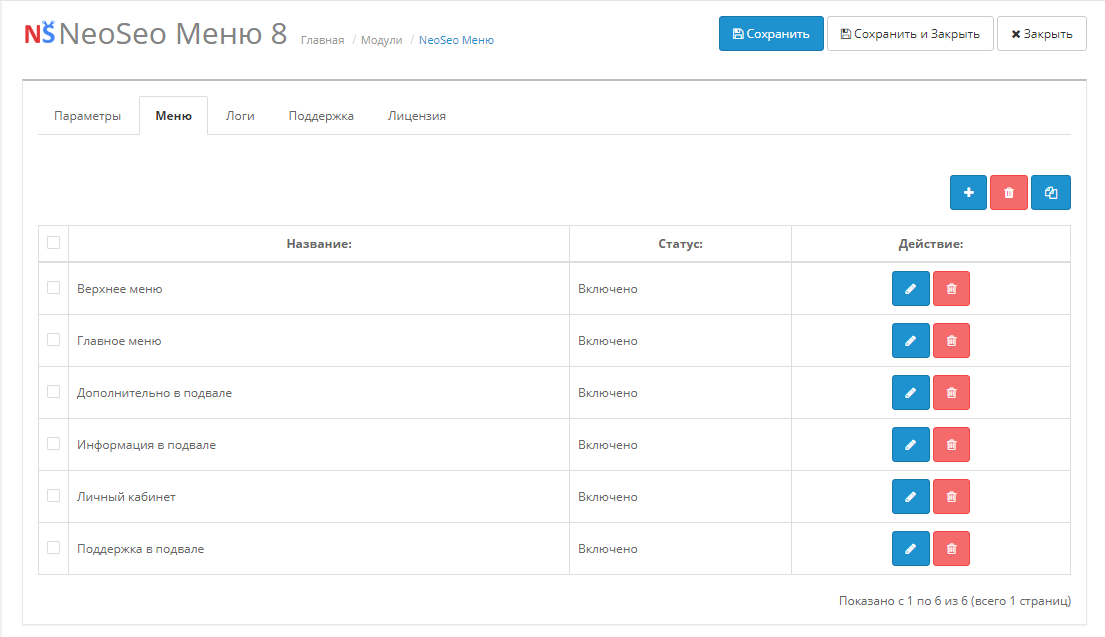
The “Menu” tab is intended for setting the following parameters:
- Adding a new menu menu.

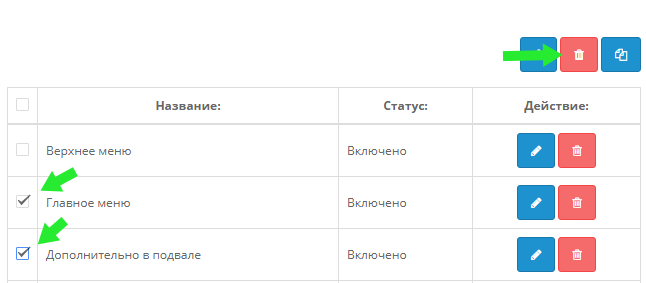
- Remove one or more menus.
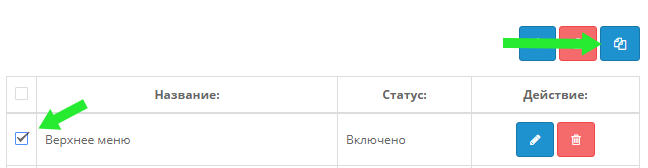
- Copy menu.
- Editing the menu.
Removing a menu.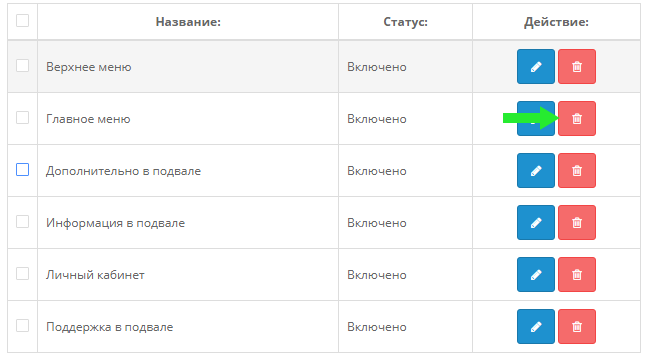
-
Editing the menu.
Status. The switch that is designed to enable or disable the menu:
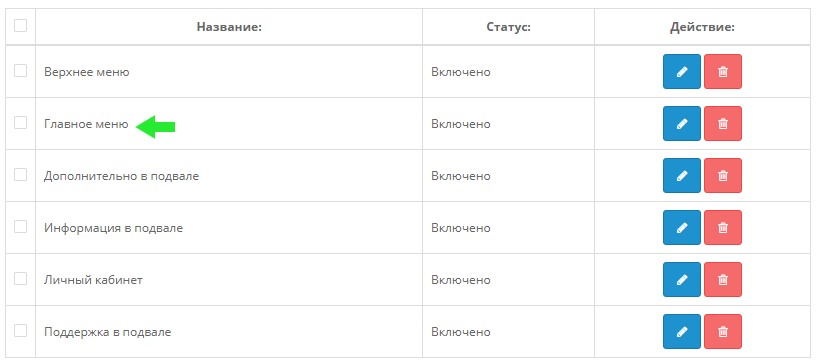
The name of the menu. This field is intended for assigning a menu name that will be displayed in the list of all available menus:
Lists of available category items to add to the menu:
Required to add menu items.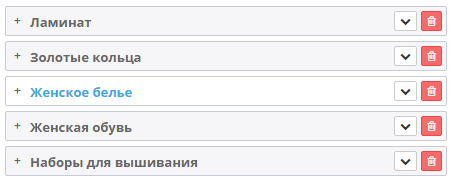
Categories.
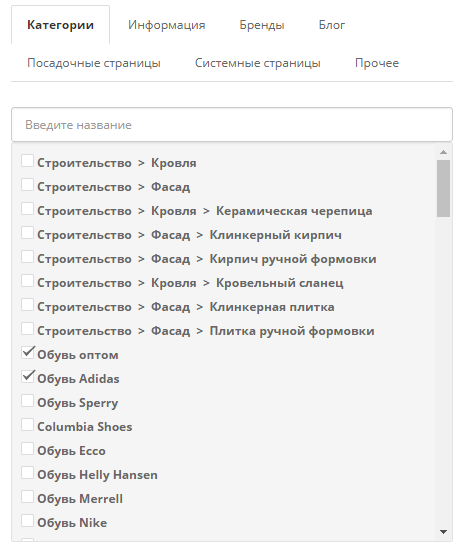
In this tab “Categories”, all available store categories are displayed.
They can be selected and added to the menu. The necessary menus must be marked with a “tick” and click on the “Add to menu” button.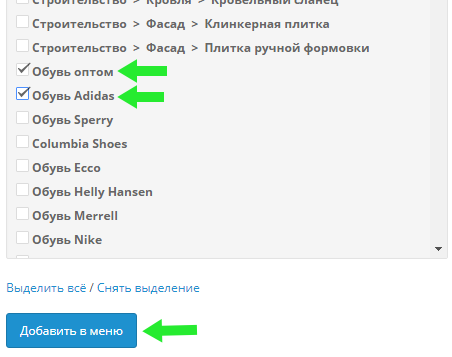
After that, the selected categories will be added to the menu list.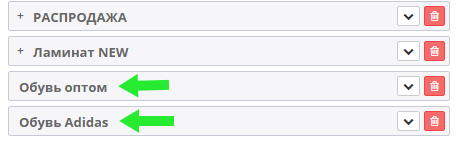
Then you need to click the “Save” button to apply the settings.
To select all categories, you must click on “Select All”, to deselect, click on “Deselect”.
You can also “filter the list of categories:
Information.

In this tab “Information”, all information pages of the store are displayed.
Brands.
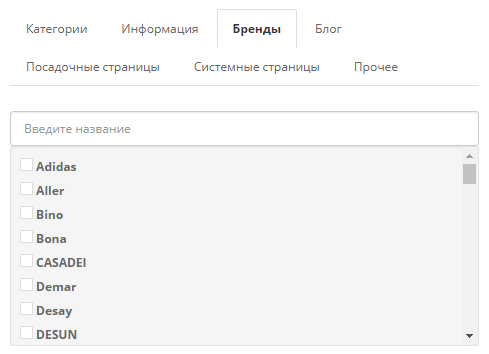
In this tab “Brands”, all brands (manufacturers) of goods are displayed.
Blog.
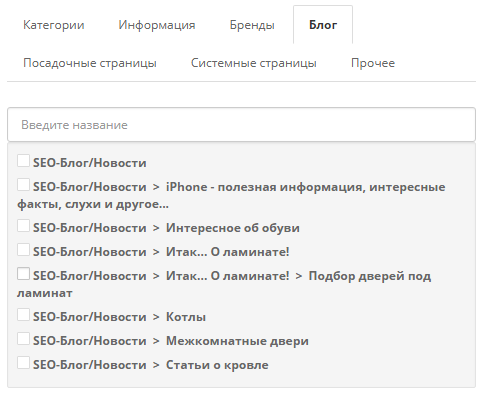
In this tab “Blog”, all available articles from the store's blog are displayed
Landing pages.
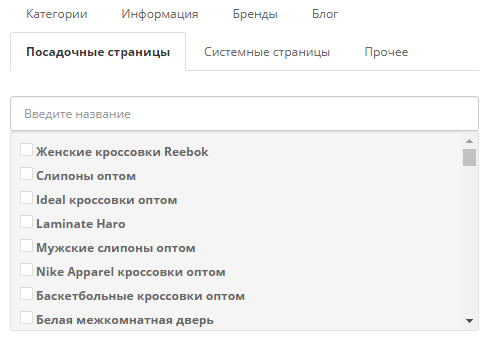
In this tab “Landing pages”, all landing pages of the store are displayed.
System pages.
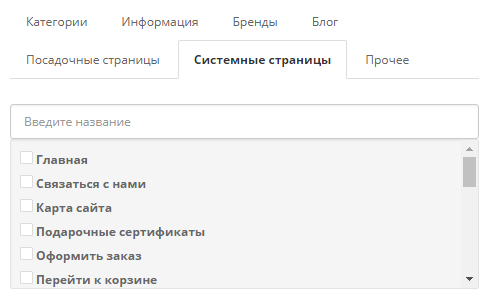 In this tab “System Pages”, all system pages of the store are displayed.
Other.
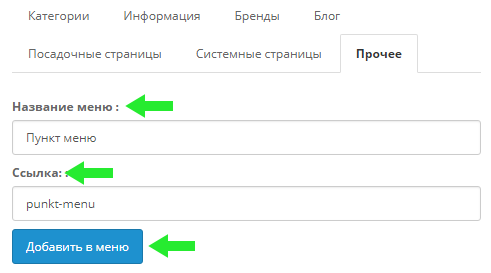
In this tab “Other”, you can add your own unique menu item.
-
Editing the list of menu items.
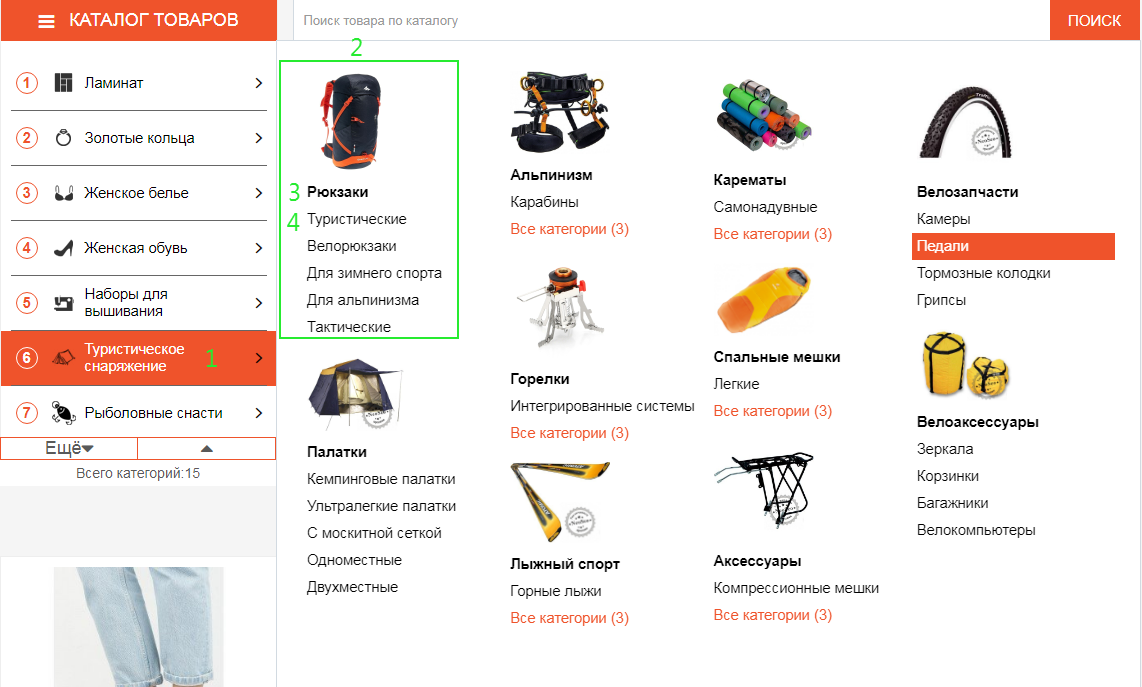
The menu is formed using the drag-and-drop method. That is, to make a category a subcategory, you need to hold down the mouse button and drag it to the “main category”.
Let's look at this diagram:

The module supports nesting up to the 4th level.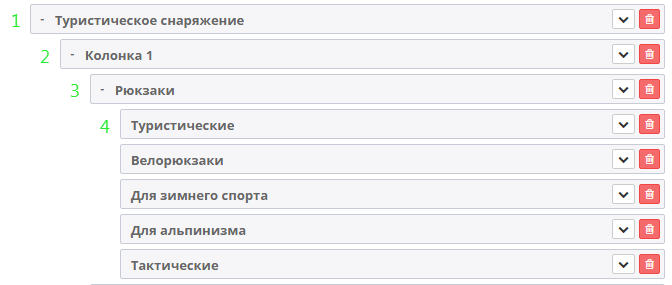

Editing a menu item.
- Name.
This field allows you to change the name of the menu item.
- Link.
This field allows you to change the menu item link if this item was added via Other.
- Additional style.
This field allows you to assign styles to a menu item. In this example, the menu item has a red font color.

For auxiliary column names (Column 1, Column 2, etc.), you must specify the additional style display: none - otherwise they are displayed in the storefront.
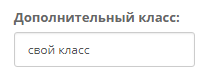
- Additional class.
This field allows you to style the menu item.
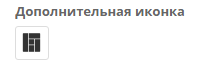
- Additional icon.
This field allows you to assign an icon to a menu item.


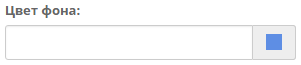
- Background color.
This field allows you to assign the background color of the menu item.
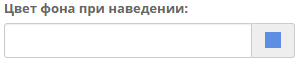
- Hover background color.
This field allows you to set the background color of the menu item on hover.
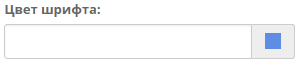
- Font color.
This field allows you to assign the font color of the menu item.
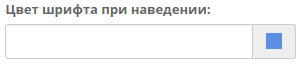
- Font color on hover.
This field allows you to set the font color of the menu item on hover.
- Image in the menu.
For the main category, this field allows you to set a submenu image. It is possible to choose the display of the image.

Background image:


Menu image:
For all other menus, this field allows you to set the main image.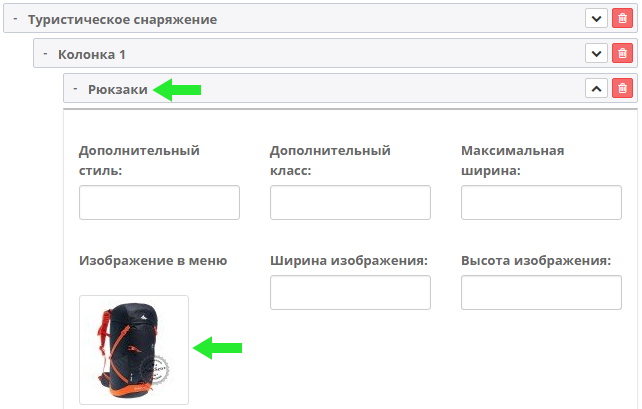
For an image, you can set:
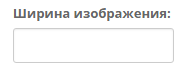
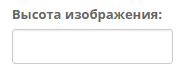
- Maximum width.
- Width.
- Height.
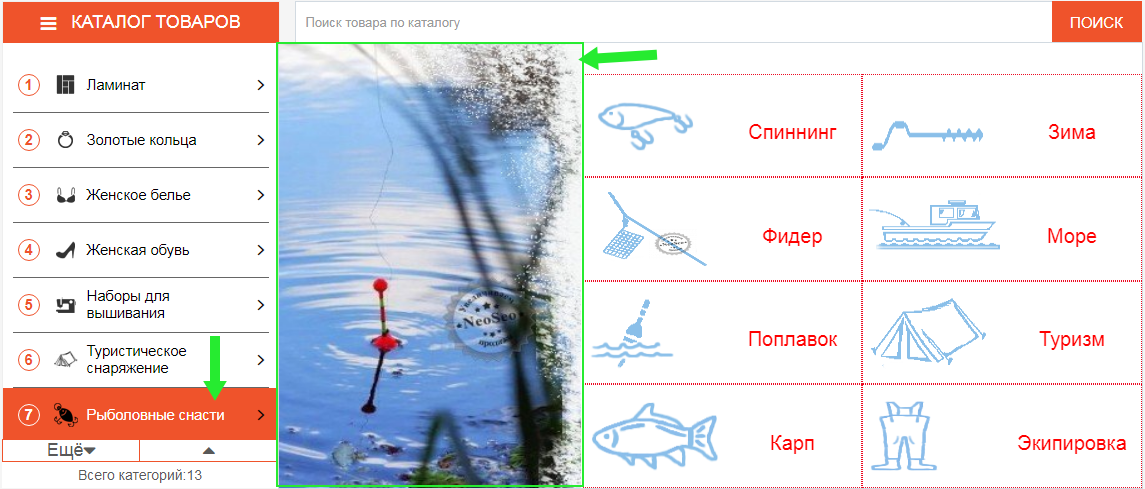
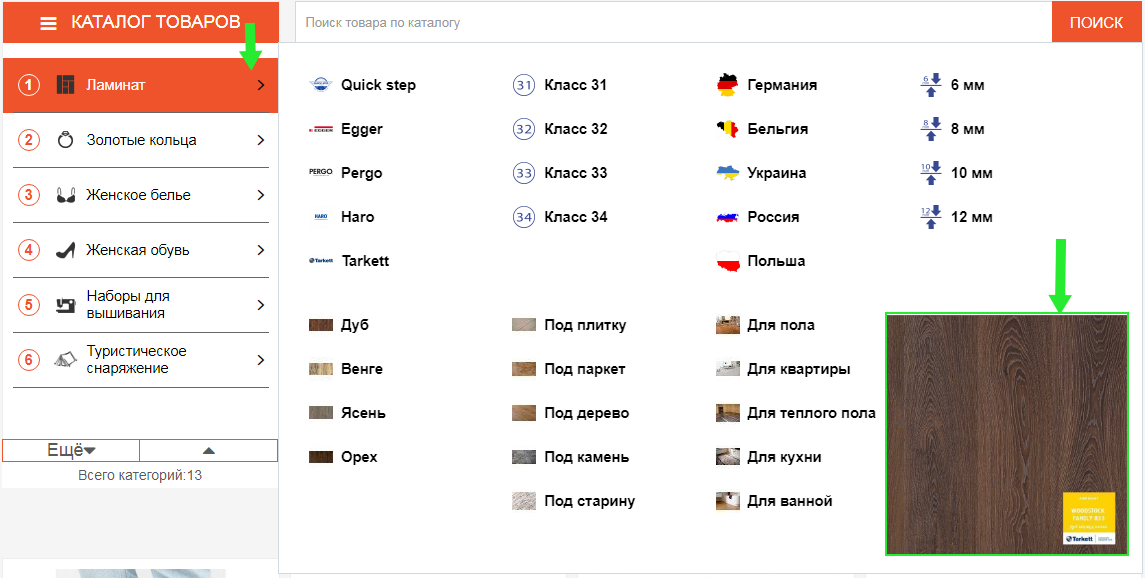
You can select the menu type for the drop-down menu (only available for the Horizontal menu): 
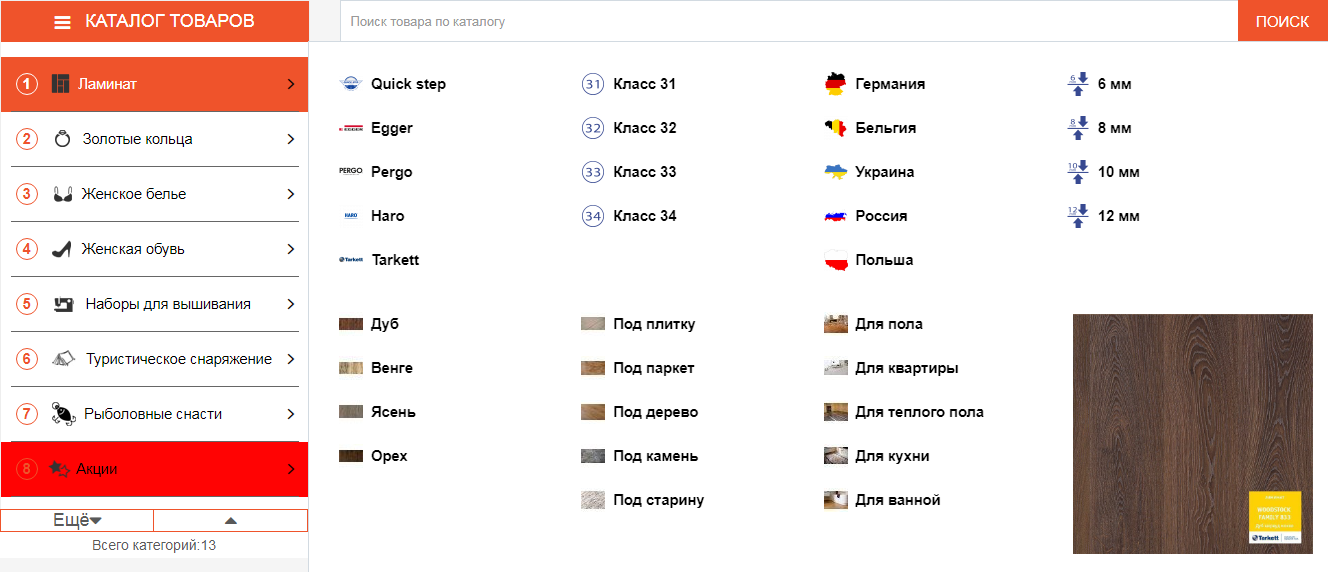
- Normal (vertical)
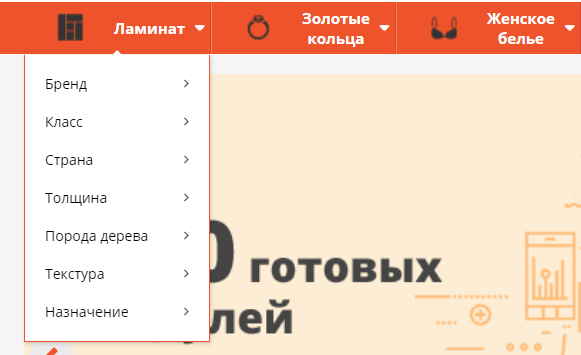
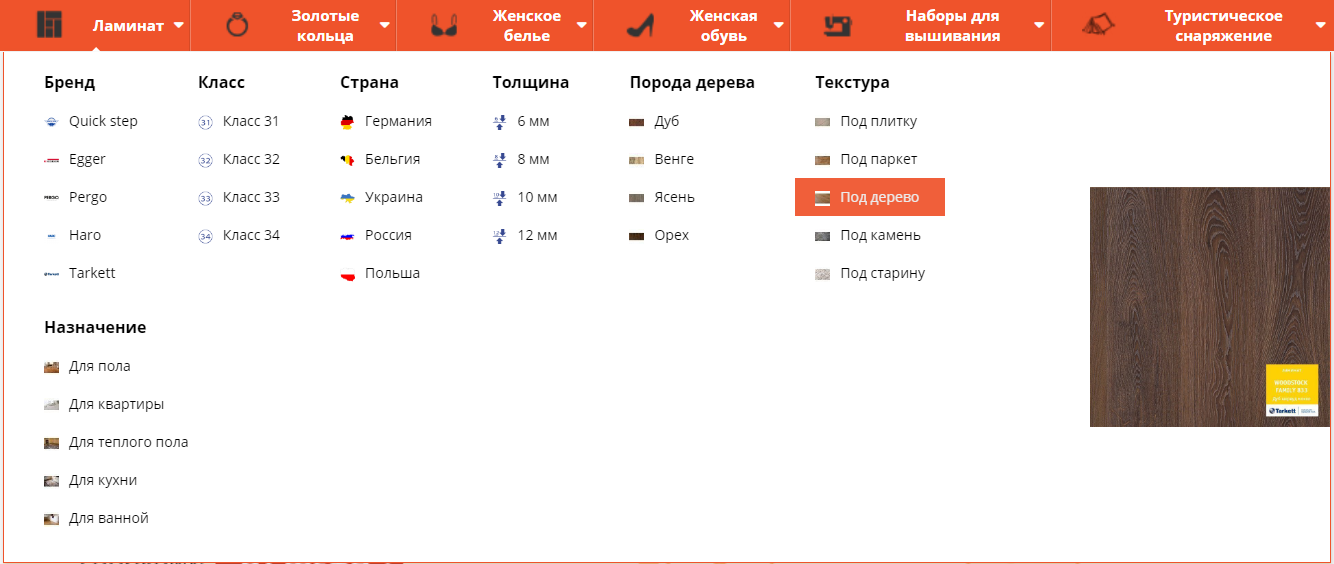
- Mega (Horizontal)
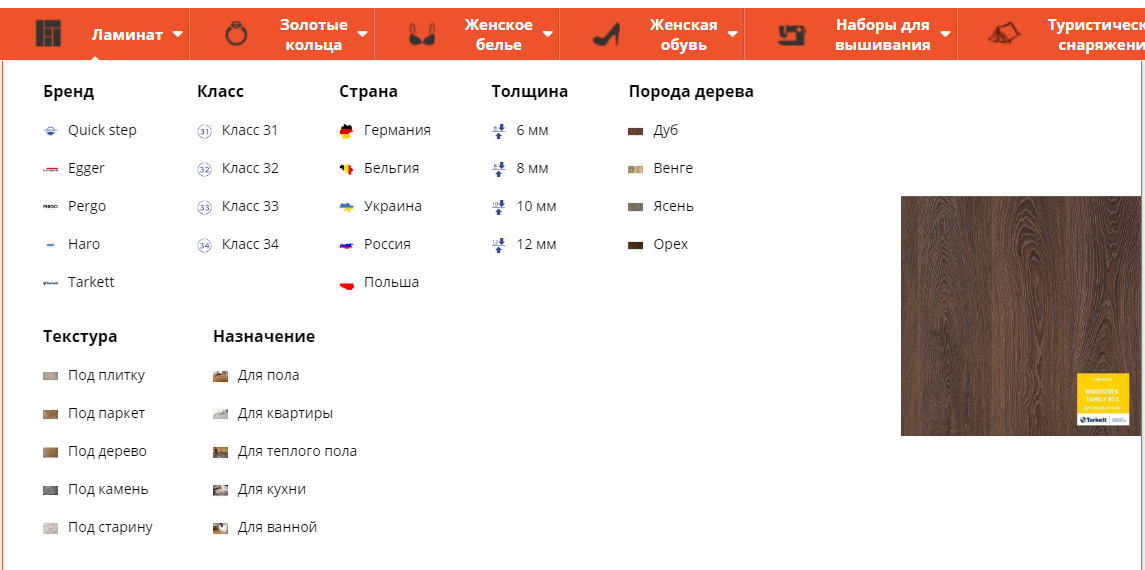
To change the menu type, you need to go to “Appearance Settings” => “Hat” => “Main Menu” .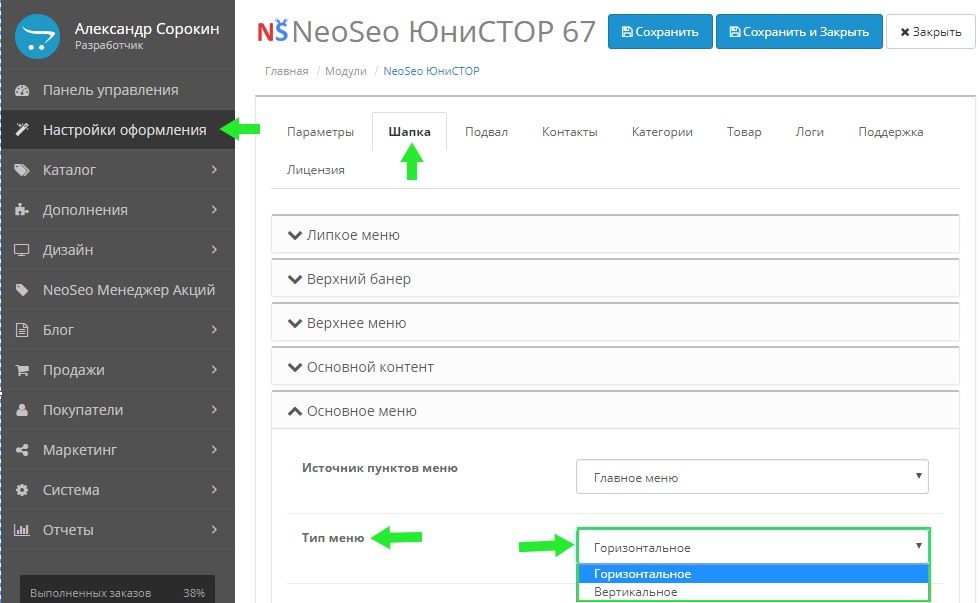
The result of the module.
Vertical menu:
Horizontal menu:


Comments