- 1
- 2
- 3
- 4
- 5
- 6
- 7
- 8
- 9
- 10
- 11
- 12
- 13
- 14
- 15
- 16
- 17
- 18
- 19
- 20
- 21
- 22
- 23
- 24
- 25
- 26
- 27
- 28
- 29
- 30
- 31
- 32
- 33
- 34
- 35
- 36
- 37
- 38
- 39
- 40
- 41
- 42
- 43
- 44
- 45
- 46
- 47
- 48
- 49
- 50
- 51
- 52
- 53
- 54
- 55
- 56
- 57
- 58
- 59
- 60
- 61
- 62
- 63
- 64
- 65
- 66
- 67
- 68
- 69
- 70
- 71
- 72
- 73
- 74
- 75
- 76
- 77
- 78
- 79
- 80
- 81
- 82
- 83
- 84
- 85
- 86
- 87
- 88
- 89
- 90
- 91
- 92
- 93
- 94
- 95
- 96
- 97
- 98
- 99
- 100
- 101
- 102
- 103
- 104
- 105
- 106
- 107
- 108
- 109
- 110
- 111
- 112
- 113
- 114
- 115
- 116
- 117
- 118
- 119
- 120
- 121
- 122
- 123
- 124
- 125
- 126
- 127
- 128
- 129
- 130
- 131
- 132
- 133
- 134
- 135
- 136
- 137
- 138
- 139
- 140
- 141
- 142
- 143
- 144
- 145
- 146
- 147
- 148
- 149
- 150
- 151
- 152
- 153
- 154
- 155
- 156
- 157
- 158
- 159
- 160
- 161
- 162
- 163
- 164
- 165
- 166
- 167
- 168
- 169
- 170
- 171
- 172
- 173
- 174
- 175
- 176
- 177
- 178
- 179
- 180
- 181
- 182
- 183
- 184
- 185
- 186
- 187
- 188
- 189
- 190
- 191
- 192
- 193
- 194
- 195
- 196
- 197
- 198
- 199
- 200
- 201
- 202
- 203
- 204
- 205
- 206
- 207
- 208
- 209
- 210
- 211
- 212
- 213
- 214
- 215
- 216
- 217
- 218
- 219
- 220
- 221
- 222
- 223
- 224
- 225
- 226
- 227
- 228
- 229
- 230
- 231
- 232
- 233
- 234
- 235
- 236
- 237
- 238
- 239
- 240
- 241
- 242
- 243
- 244
- 245
- 246
- 247
- 248
- 249
- 250
- 251
- 252
- 253
- 254
- 255
- 256
- 257
- 258
- 259
- 260
- 261
- 262
- 263
- 264
- 265
- 266
- 267
- 268
- 269
- 270
- 271
- 272
- 273
- 274
- 275
- 276
- 277
- 278
- 279
- 280
- 281
- 282
- 283
- 284
- 285
- 286
- 287
- 288
- 289
- 290
- 291
- 292
- 293
- 294
- 295
- 296
- 297
- 298
- 299
- 300
- 301
- 302
- 303
- 304
- 305
- 306
- 307
- 308
- 309
- 310
- 311
- 312
- 313
- 314
- 315
- 316
- 317
- 318
- 319
- 320
- 321
- 322
- 323
- 324
- 325
- 326
- 327
- 328
- 329
- 330
- 331
- 332
- 333
- 334
- 335
- 336
- 337
- 338
- 339
- 340
- 341
- 342
- 343
- 344
- 345
- 346
- 347
- 348
- 349
- 350
- 351
- 352
- 353
- 354
- 355
- 356
- 357
- 358
- 359
- 360
- 361
- 362
- 363
- 364
- 365
- 366
- 367
- 368
- 369
- 370
- 371
- 372
- 373
- 374
- 375
- 376
- 377
- 378
- 379
- 380
- 381
- 382
- 383
- 384
- 385
- 386
- 387
- 388
- 389
- 390
- 391
- 392
- 393
- 394
- 395
- 396
- 397
- 398
- 399
- 400
- 401
- 402
- 403
- 404
- 405
- 406
- 407
- 408
- 409
- 410
- 411
- 412
- 413
- 414
- 415
- 416
- 417
- 418
- 419
- 420
- 421
- 422
- 423
- 424
- 425
- 426
- 427
- 428
- 429
- 430
- 431
- 432
- 433
- 434
- 435
- 436
- 437
- 438
- 439
- 440
- 441
- 442
- 443
- 444
- 445
- 446
- 447
- 448
- 449
- 450
- 451
- 452
- 453
- 454
- 455
- 456
- 457
- 458
- 459
- 460
- 461
- 462
- 463
- 464
- 465
- 466
- 467
- 468
- 469
- 470
- 471
- 472
- 473
- 474
- 475
- 476
- 477
- 478
- 479
- 480
- 481
- 482
- 483
- 484
- 485
- 486
- 487
- 488
- 489
- 490
- 491
- 492
- 493
- 494
- 495
- 496
- 497
- 498
- 499
- 500
- 501
- 502
- 503
- 504
- 505
- 506
- 507
- 508
- 509
- 510
- 511
- 512
- 513
- 514
- 515
- 516
- 517
- 518
- 519
- 520
- 521
- 522
- 523
- 524
- 525
- 526
- 527
- 528
- 529
- 530
- 531
- 532
- 533
- 534
- 535
- 536
- 537
- 538
- 539
- 540
- 541
- 542
- 543
- 544
- 545
- 546
- 547
- 548
- 549
- 550
- 551
- 552
- 553
- 554
- 555
- 556
- 557
- 558
- 559
- 560
- 561
- 562
- 563
- 564
- 565
- 566
- 567
- 568
- 569
- 570
- 571
- 572
- 573
- 574
- 575
- 576
- 577
- 578
- 579
- 580
- 581
- 582
- 583
- 584
- 585
- 586
- 587
- 588
- 589
- 590
- 591
Configuring the module Subscription for OpenCart
-
Installing the “NeoSeo Subscription” module
To install the module “NeoSeo Subscription” for OpenCart you need:< /p>
- Go to the site administration panel and select the “Add-ons”->”Modules”:

- In the list of modules that opens, select “NeoSeo Subscription” and click the “Install”:

- Go to the “Add-ons”->”Add-ons Manager” section and click on the “Update” button in the window that opens.

This completes the installation of the module and you can proceed to editing the module settings.
-
Edit module settings
To edit module settings, go to the site administration panel and select “Add-ons”->”Modules”. In the opened list of modules for OpenCart, select “NeoSeo Subscription” and click on the “Edit” button:
After that, a window for editing the module settings will appear on the screen: : 10px; width: 758px;" />
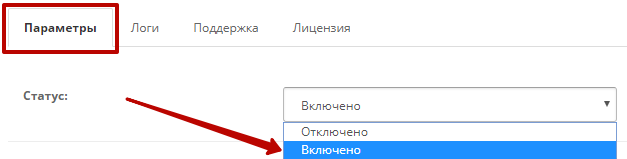
The “Parameters” tab is intended for setting the following parameters:
- Enable/disable the module. In order to connect the module to the store, it is necessary in the “Status” select value “Enabled”:
- Use the name field in the subscription form. By default, in order to subscribe to store news, the user must enter his email in the subscription form:

This module allows the user to enter not only email, but also his name:
In order to add the ability to enter the subscriber's name in the form, in the “Use the name field in the subscription form” field, select the value “Enabled”:
- Title. Use this field to set the title for the subscription form. The module allows you to add a title for all store languages (in this case, for English, Russian and Ukrainian). For example, let's add a form title “Subscribe Now”:

- New subscription message. This field is used to enter a message that the user will see when they successfully subscribe to the news. For example, let's enter the message “Thank you for subscribing to our news”.
Please note that this field is multilingual, i.e. allows you to enter a message about a new subscription in all languages of the store: ;width: 1064px;" />
As a result, after subscribing, the user will see the following message: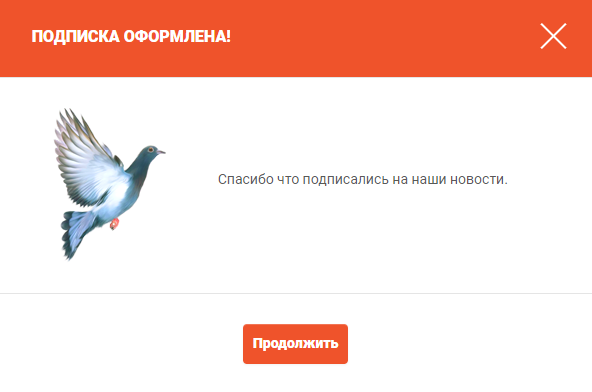
- Subscription error message. This field is used to enter a message that the user will see if he subscribes again (enters an email address that is already registered in the system). For example, enter the message “You are already subscribed to our news.”
This field is multilingual, i.e. allows you to enter a message in all store languages: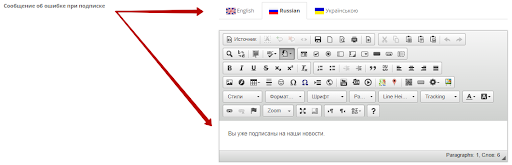
As a result, after subscribing again, the user will see the following message: : 10px; width: 527px;" />
- Recipients of subscription notifications. This field is used to enter email addresses of recipients of subscription notifications:

If you need to send email notifications to multiple recipients, enter their email addresses separated by commas:

- New subscription email subject. The module offers to set the email subject for the recipient of new subscriber notifications:

- New subscription email message. This field is used to form the text of the email that will be sent to the recipient of new subscriber notifications. When forming a message, you can use a special tag {email}, which contains the email address of the current subscriber.
For an example, let's enter the following message: “A visitor with email {email} subscribed to our news.”:
As a result, when a new subscription is made, the following email message will be sent to the email address of the notification recipient:
Important!!! After adding all the changes, you must click the “Save” button:
In order for the subscription form to be displayed on the site, this module must be added to the required schema. To do this, go to the site administration panel and select the section “Design”->”Schemes”. In the list of schemes, select the scheme to which you want to add the form and click on the “Edit” ;. For this example, let's choose the scheme “Main”:

In the scheme editing window, click on the button “Add module”:

In the list of modules, select “NeoSeo Subscription”, in the “Location” column, select the desired block location and set the sort order: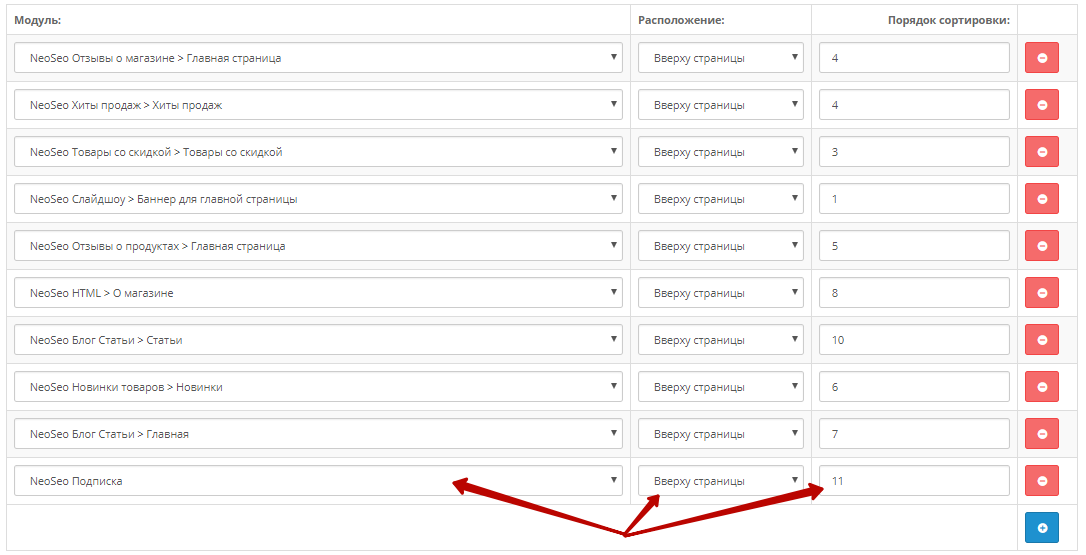
After making all the changes, click on the “Save” button:
In addition to sending email notifications about new subscriptions, this module saves subscriber data in a separate menu. After installing the module, in the site administration panel, in the “Customers” section, a new menu item “Subscribers” is available:
This section allows:
- View list of subscribers:
- Edit subscriber data. To do this, select the desired application and click on the “Edit” button:

As a result, we go to the subscription editing form:
It is possible to set up the following fields on this form: subscription date, subscriber's e-mail, subscriber's name.

Important!!! After adding all the changes, you must click the “Save” button.
- Remove followers. To do this, mark the required application and click on the “Delete” button:

- Export subscriber data. This module allows you to export subscriber data. When you click on the “Export” button, a “subscribe.csv” file containing the names of subscribers and their email addresses will be downloaded to your computer:

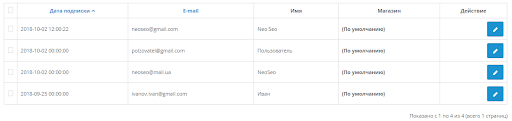
- Search by subscribers. The module allows you to search for subscribers by the following options: subscription date, subscriber email, store:

To filter subscribers, enter a value in the required option and click on the “Filter” button. For example, let's filter by the “subscriber's email” option:
After clicking on the “Filter” button, we get the filtering result:


Comments