- 1
- 2
- 3
- 4
- 5
- 6
- 7
- 8
- 9
- 10
- 11
- 12
- 13
- 14
- 15
- 16
- 17
- 18
- 19
- 20
- 21
- 22
- 23
- 24
- 25
- 26
- 27
- 28
- 29
- 30
- 31
- 32
- 33
- 34
- 35
- 36
- 37
- 38
- 39
- 40
- 41
- 42
- 43
- 44
- 45
- 46
- 47
- 48
- 49
- 50
- 51
- 52
- 53
- 54
- 55
- 56
- 57
- 58
- 59
- 60
- 61
- 62
- 63
- 64
- 65
- 66
- 67
- 68
- 69
- 70
- 71
- 72
- 73
- 74
- 75
- 76
- 77
- 78
- 79
- 80
- 81
- 82
- 83
- 84
- 85
- 86
- 87
- 88
- 89
- 90
- 91
- 92
- 93
- 94
- 95
- 96
- 97
- 98
- 99
- 100
- 101
- 102
- 103
- 104
- 105
- 106
- 107
- 108
- 109
- 110
- 111
- 112
- 113
- 114
- 115
- 116
- 117
- 118
- 119
- 120
- 121
- 122
- 123
- 124
- 125
- 126
- 127
- 128
- 129
- 130
- 131
- 132
- 133
- 134
- 135
- 136
- 137
- 138
- 139
- 140
- 141
- 142
- 143
- 144
- 145
- 146
- 147
- 148
- 149
- 150
- 151
- 152
- 153
- 154
- 155
- 156
- 157
- 158
- 159
- 160
- 161
- 162
- 163
- 164
- 165
- 166
- 167
- 168
- 169
- 170
- 171
- 172
- 173
- 174
- 175
- 176
- 177
- 178
- 179
- 180
- 181
- 182
- 183
- 184
- 185
- 186
- 187
- 188
- 189
- 190
- 191
- 192
- 193
- 194
- 195
- 196
- 197
- 198
- 199
- 200
- 201
- 202
- 203
- 204
- 205
- 206
- 207
- 208
- 209
- 210
- 211
- 212
- 213
- 214
- 215
- 216
- 217
- 218
- 219
- 220
- 221
- 222
- 223
- 224
- 225
- 226
- 227
- 228
- 229
- 230
- 231
- 232
- 233
- 234
- 235
- 236
- 237
- 238
- 239
- 240
- 241
- 242
- 243
- 244
- 245
- 246
- 247
- 248
- 249
- 250
- 251
- 252
- 253
- 254
- 255
- 256
- 257
- 258
- 259
- 260
- 261
- 262
- 263
- 264
- 265
- 266
- 267
- 268
- 269
- 270
- 271
- 272
- 273
- 274
- 275
- 276
- 277
- 278
- 279
- 280
- 281
- 282
- 283
- 284
- 285
- 286
- 287
- 288
- 289
- 290
- 291
- 292
- 293
- 294
- 295
- 296
- 297
- 298
- 299
- 300
- 301
- 302
- 303
- 304
- 305
- 306
- 307
- 308
- 309
- 310
- 311
- 312
- 313
- 314
- 315
- 316
- 317
- 318
- 319
- 320
- 321
- 322
- 323
- 324
- 325
- 326
- 327
- 328
- 329
- 330
- 331
- 332
- 333
- 334
- 335
- 336
- 337
- 338
- 339
- 340
- 341
- 342
- 343
- 344
- 345
- 346
- 347
- 348
- 349
- 350
- 351
- 352
- 353
- 354
- 355
- 356
- 357
- 358
- 359
- 360
- 361
- 362
- 363
- 364
- 365
- 366
- 367
- 368
- 369
- 370
- 371
- 372
- 373
- 374
- 375
- 376
- 377
- 378
- 379
- 380
- 381
- 382
- 383
- 384
- 385
- 386
- 387
- 388
- 389
- 390
- 391
- 392
- 393
- 394
- 395
- 396
- 397
- 398
- 399
- 400
- 401
- 402
- 403
- 404
- 405
- 406
- 407
- 408
- 409
- 410
- 411
- 412
- 413
- 414
- 415
- 416
- 417
- 418
- 419
- 420
- 421
- 422
- 423
- 424
- 425
- 426
- 427
- 428
- 429
- 430
- 431
- 432
- 433
- 434
- 435
- 436
- 437
- 438
- 439
- 440
- 441
- 442
- 443
- 444
- 445
- 446
- 447
- 448
- 449
- 450
- 451
- 452
- 453
- 454
- 455
- 456
- 457
- 458
- 459
- 460
- 461
- 462
- 463
- 464
- 465
- 466
- 467
- 468
- 469
- 470
- 471
- 472
- 473
- 474
- 475
- 476
- 477
- 478
- 479
- 480
- 481
- 482
- 483
- 484
- 485
- 486
- 487
- 488
- 489
- 490
- 491
- 492
- 493
- 494
- 495
- 496
- 497
- 498
- 499
- 500
- 501
- 502
- 503
- 504
- 505
- 506
- 507
- 508
- 509
- 510
- 511
- 512
- 513
- 514
- 515
- 516
- 517
- 518
- 519
- 520
- 521
- 522
- 523
- 524
- 525
- 526
- 527
- 528
- 529
- 530
- 531
- 532
- 533
- 534
- 535
- 536
- 537
- 538
- 539
- 540
- 541
- 542
- 543
- 544
- 545
- 546
- 547
- 548
- 549
- 550
- 551
- 552
- 553
- 554
- 555
- 556
- 557
- 558
- 559
- 560
- 561
- 562
- 563
- 564
- 565
- 566
- 567
- 568
- 569
- 570
- 571
- 572
- 573
- 574
- 575
- 576
- 577
- 578
- 579
- 580
- 581
- 582
- 583
- 584
- 585
- 586
- 587
- 588
- 589
- 590
- 591
Setting up the module “NeoSeo Integration with Class365” for the online store {SEO-Shop}, OpenCart 2.x, 3.x, ocStore
Description of the main functions of the module “NeoSeo Integration with Class365”
The module "NeoSeo Integration with Class365" allows you to integrate your online store on OpenCart, ocStore, {SEO-Shop} with CRM system Class365. Thanks to this interaction, the procedure of creating the entire structure of categories and products that after integration can be received in your store is simplified.
The main purpose of this module is to receive orders from the online store on OpenCart, ocStore, {SEO-Shop} and their further transfer to the Class365 accounting system, and content management (name, description, structure), control of balances, prices - to be performed on the side Class365.
The module is also able to give the initial structure to Class365, namely to create categories and create related products in Class365, which will allow you to quickly fill the online store with new goods.
Flexible module settings will allow you to fine-tune the exchange policy of OpenCart, ocStore, {SEO-Shop} with Class365, there is the ability to disable / enable updating of the description, attributes, product options, transfer of special fields like Barcode, article number, model, as well as uploading non-standard product fields created in Class365.
Possibilities for obtaining promotional prices, discounts, informing about the remaining goods in warehouses from Class365 have been realized. Work with orders also has subtle settings - which will allow uploading a new order to Class365 and transferring the delivery method, comment to the order, and customer data. After processing the order in Class365, you can return to the online store on OpenCart, ocStore, {SEO-Shop} the new status of this order and if the list of goods has changed or their quantity has been transferred back to the store.
Get a 14-day test license for free to test all of these features.
Module installation
The procedure for installing the module “NeoSeo Integration with Class365” is necessary:
- Install the module and license files on the site.
- After the module files and the license are installed on the site, go to the site’s administrative panel and select the “Add-ons”->”Modules”section:
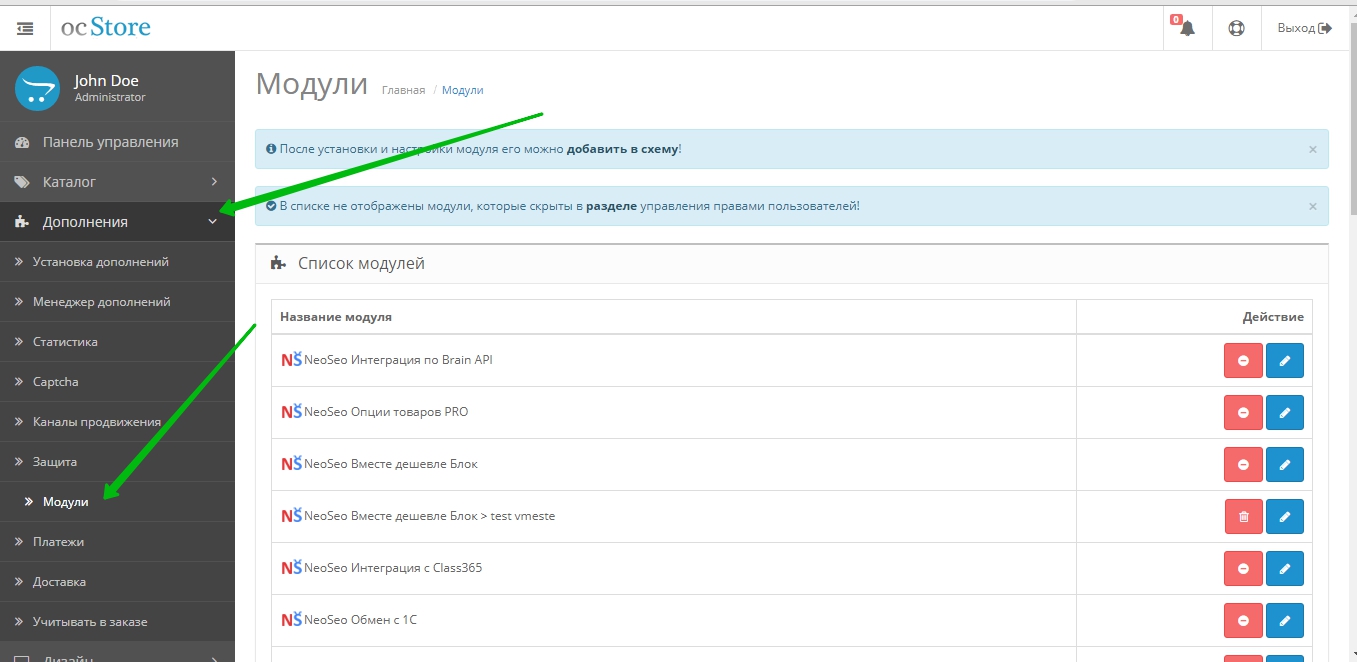
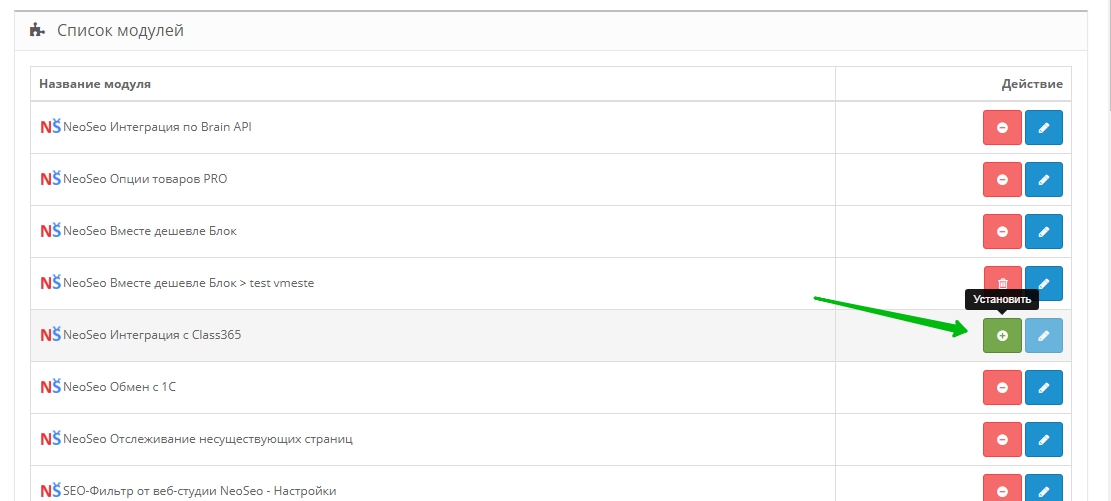
- In the list of modules that opens, select “NeoSeo Integration with Class365” and click the “Install”: button
- You must go to the “Add-ons”->”Add-ons Manager”: section
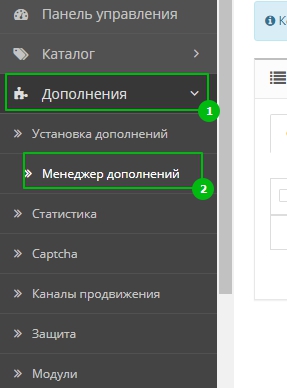
- In the “Add-ons Manager” section, you need to update the modifiers.

Module setup and synchronization with Class 365
Basic module settings
The “Settings” tab contains the basic settings of the module. Consider each option in more detail. 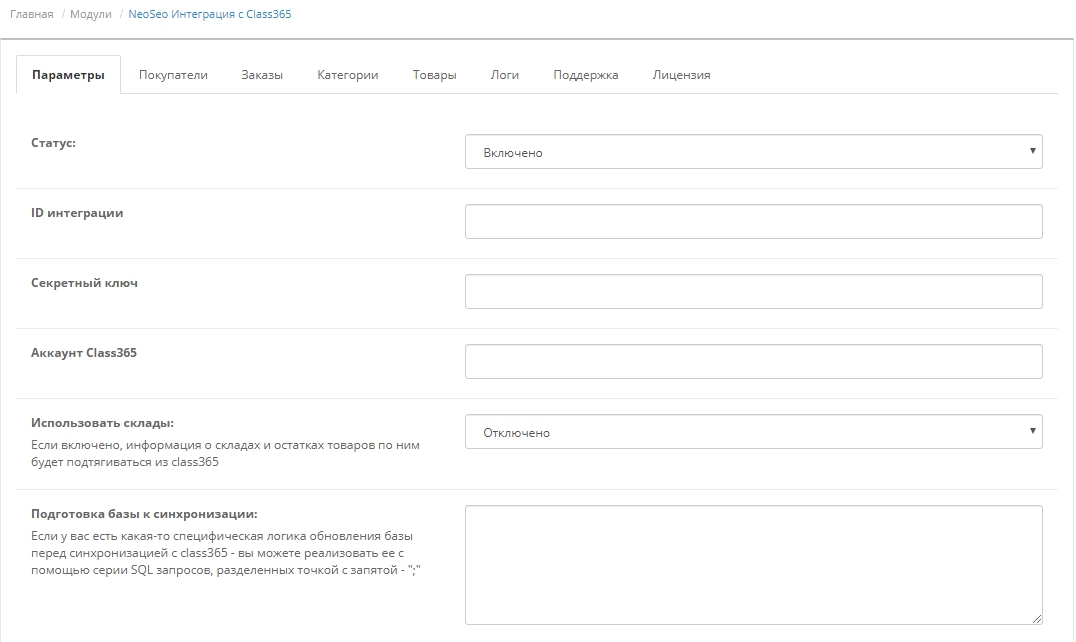
Status
Module status (Enabled / Disabled values). 
Integration ID
In this option, you must specify the integration ID obtained from class365 when creating the connection.
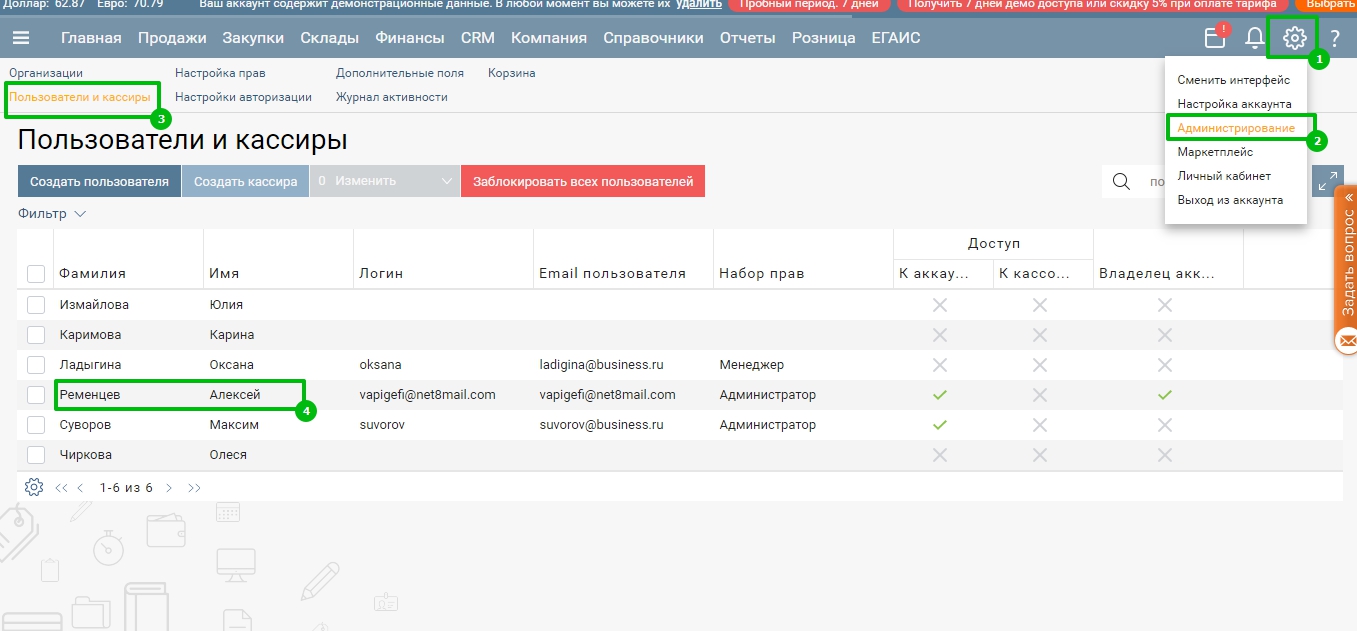
To obtain connection data on the Class365 side, the following series of actions must be performed:
- Go to your previously registered account in class365.ru
- In the additional menu (Gear icon), select Marketplace
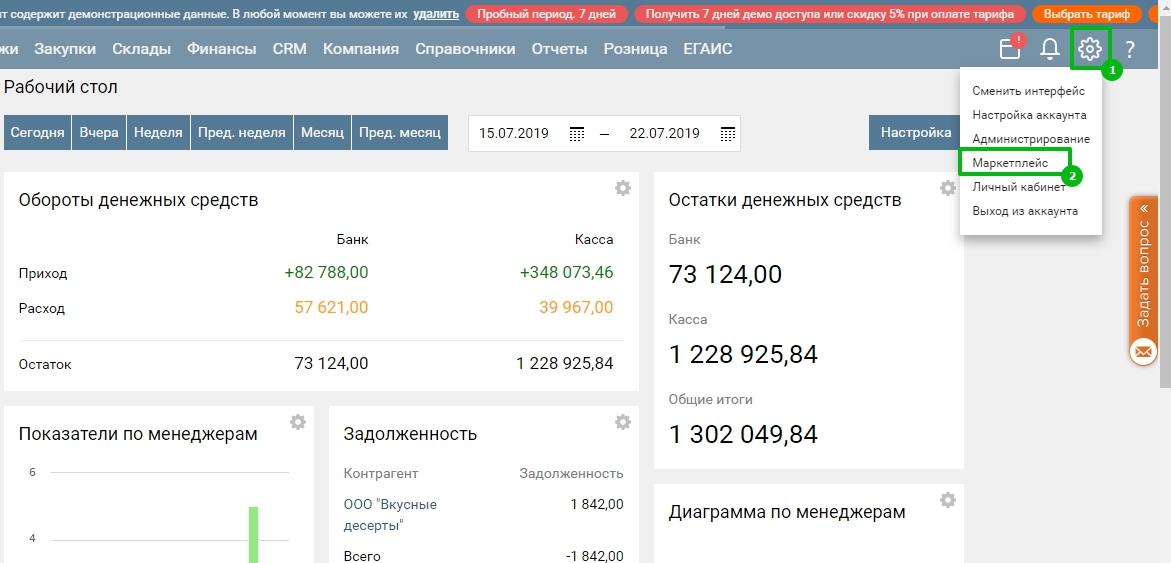
- In the list provided, you need to find the item Miscellaneous and select the connection Integration by API
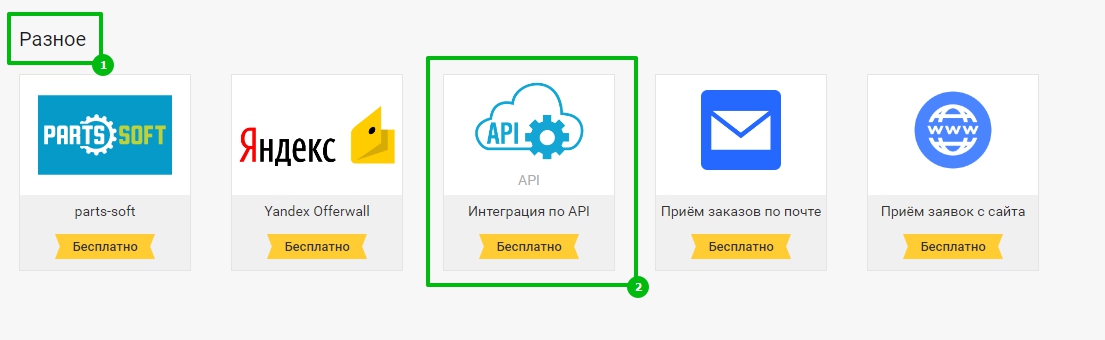
- In the Integration window that appears, click the Connect button

- In the new Integration Connection window, save such integration Id and Secret key, these points must be entered in the appropriate module settings. Enter any name for the connection and click Save
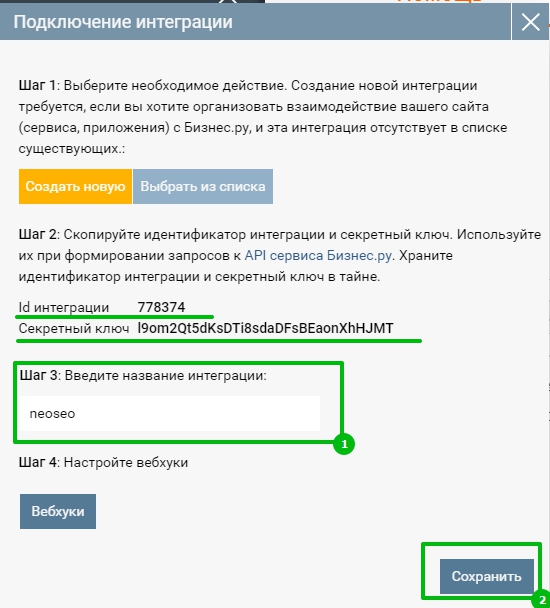
Specify the received data in the module settings, namely two options for Id integration and Secret key 
Class365 Account
To end the connection, you must specify the account name - login. This value can be obtained from the address bar of your class365 account. In the example, this is the login a11012 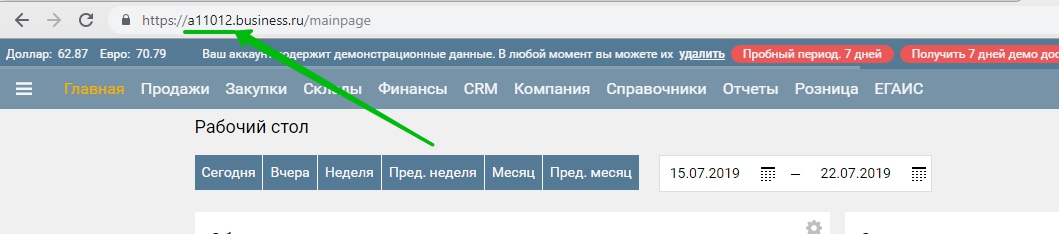

Use warehouses
This setting serves as activation of the function of accounting for stock balances. The warehouses attached to class 365 to the goods will be displayed in the store. 
Preparing the base for synchronization
If you have any specific logic for updating the database before synchronizing with class 365, you can implement it using a series of SQL queries separated by a semicolon - ";" 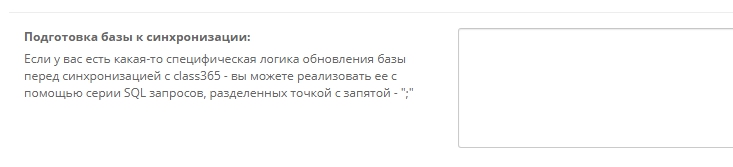
Base Finishing
If you have any specific logic for updating the database after synchronization with class365, you can implement it using a series of SQL queries separated by a semicolon - ";" 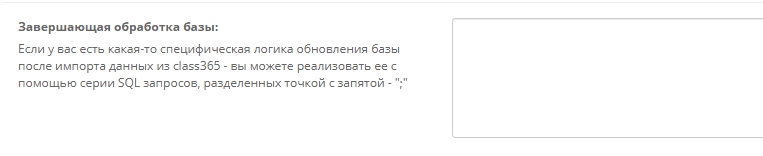
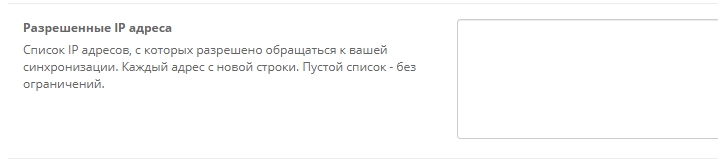
Allowed IP Addresses
A list of IP addresses that are allowed to access your synchronization. Each address is on a new line. An empty list - no restrictions. For this option to work correctly, you need to find out in the Class 365 IP support of their server, which will access your site for synchronization.
Enter the frequency to start full synchronization in minutes.
If you use the synchronization mode ordersOnly (only orders and buyers) and the full exchange, then you must definitely separate the two exchanges, as Class 365 blocks too frequent requests from one server if two exchanges start simultaneously.
In this parameter you can specify the period in minutes when you need to start a full exchange. That is, for example, your orders are updated every 5 minutes, but you also need a full exchange, then you need to specify, for example, the value 60, which means that a full exchange will start every 60 minutes. Thus, you need to specify only one exchange with the ordersOnly parameter - every 5 minutes in the schedule and the automatic module will turn on a full exchange every 60 minutes instead of fast. 
Link to start sharing
The link is of the form http: //domain/cron/neoseo_class365.php. Run this link if you need to quickly test the exchange, but if your synchronization takes a long time (a large number of products), the restriction on the operation of your server scripts will work. For a complete exchange, it is recommended to use the link in the Command for cron. field.
Command for cron
View Link
php C: \ site_path \ domain \ cron \ neoseo_class365.php. This link must be specified in the cron (schedule) of your server, this link starts a full exchange with class365 
Command for cron, only orders and buyers
View Link
php C: \ OSPanel \ domains \ ocstore21 \ cron \ neoseo_class365.php ordersOnly. This link is also indicated in cron to start the scheduled exchange. But this link only starts exchanging orders and buyers. This synchronization mode is necessary if you have a full exchange too long, and orders are unloaded much faster. It is possible to exchange orders without exchange goods. .jpg)
Remove Relations
This button allows you to delete all links with class365, that is, on the side of the store, tables that had records of links will be cleared, for example, product id in the store and product id in class365
ATTENTION! Whenever you change the settings, you must save the module settings.
Buyers
This tab allows you to configure exchanges with Class 365 by customers. 
Buyer Sync
This parameter defines the exchange mode with Class365 by customers. There are 4 modes:
- Disabled - In this mode, the exchange of buyers is disabled on both sides.
- Only in the store - This mode only allows you to receive customers from class365, as well as delete them - all changes will occur only in the store
- Only in class365 - In this mode, customers will be unloaded from the store to class365 one way. All changes occur in class365.
- Both in the store and in class365 - Exchange will work in both directions. First, customers will come from class365 to the store, then those customers who are not in class365 will go to class365.
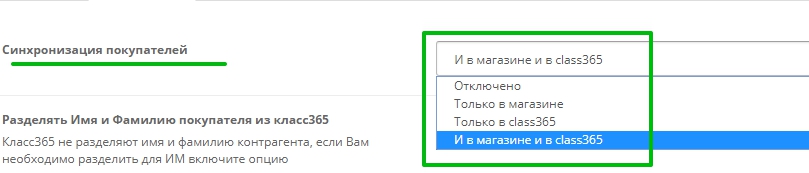
Separate Buyer Name and Surname from class365
Class365 do not share the name and surname of the counterparty, if you need to split for the store enable the option. Customers who come from class365 their names will be divided into Name and Surname according to open card standards. This parameter applies only to the store. 
Disable customer synchronization when starting an exchange with the ordersOnly parameter
If you use the exchange mode with the parameter ordersOnly (the exchange of only orders and buyers) and the option to start the full exchange is set and you need to disable the update of buyers only for a quick exchange of orders - then enable this parameter. During a quick exchange of orders with the parameter ordersOnly will work without synchronizing buyers, and a full exchange will already use the exchange mode of buyers.

Remove Buyers
Button remove customers - serves as a quick cleaning of customers in the store 
Orders
On this tab, you can configure the exchange of store orders and class365
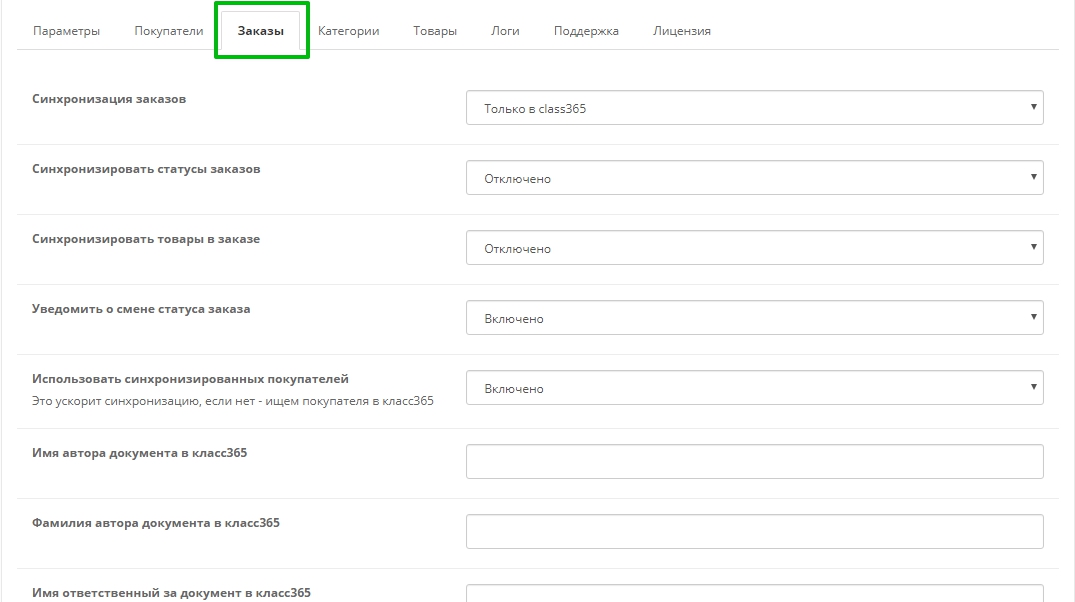
Order Sync
This parameter defines the exchange mode with Class365 orders. There are 4 modes:
- Disabled - In this mode, order exchange is disabled on both sides.
- Only in the store - This mode is not currently used, because in order to receive an order from class365 you must first send it there
- Only in class365 - In this mode, orders will only be sent from the store to class365.
- Both in the store and in class365 - Exchange will work in both directions with restriction. First, orders are uploaded to class365, then a synchronized order from class365 arrives at the store and updates it. In this mode, only the store creates new orders; from class365, new orders will not be created on the side of the store, but only already synchronized ones will be updated.

Sync order statuses
This parameter enables receiving statuses of synchronized orders from class365 to the store. The work of this function is as follows:
- A new order is sent from the store to class365
- In class365, the status of the received order changes, for example, “Done”
- During the subsequent exchange, the status of this order is returned from class365 to the store and a check is made for the existence of such a status (“Done”) on the side of the store, if such a status exists, it is assigned to this order
As a result, the order status changed in class365 and the order returned to the store with a new status. This parameter works only in two-way exchange mode. 
Synchronize products in order
This setting allows you to synchronize the composition of the goods in the order if the list of goods has been changed on the class365 side. Change in the composition of goods (quantity, other goods) will only occur on the side of the store. This item works like this:
- A new order is unloaded from the store in class365
- In Class365, this order is edited - the list of goods and their quantity change
- During the subsequent exchange from class365, the updated order goes to the store and the list of goods is updated
If you change the list of goods in the store after the exchange has been made and the order has already reached class365, then in the store all changes for this order will be cleared and the order will be received from class365.
This parameter works only in two-way exchange mode.

Notify of order status change
This setting allows you to notify the buyer when changing the status of a class 365 when using the option Synchronize order statuses

Use synced buyers
This parameter allows you to use already synchronized customers during order exchange to speed up the work of adding a customer to an order in class365.
.jpg)
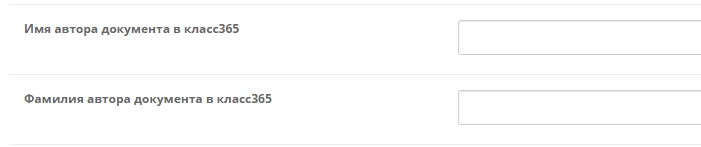
Name of the author of the document in class365 and Surname
In this setting, specify the Name and Surname of the document author in class365, with this name an order will be added to class365 as owner
You can get user data in class365 who will be as the author in the order here
Name responsible for the document in class 365 and Last name
The responsible person can be indicated the same as in the author, or another using the same procedure
Name of the organization
The name of the organization to which orders from the store will be assigned; in Class365, the name of the organization can be obtained in this way 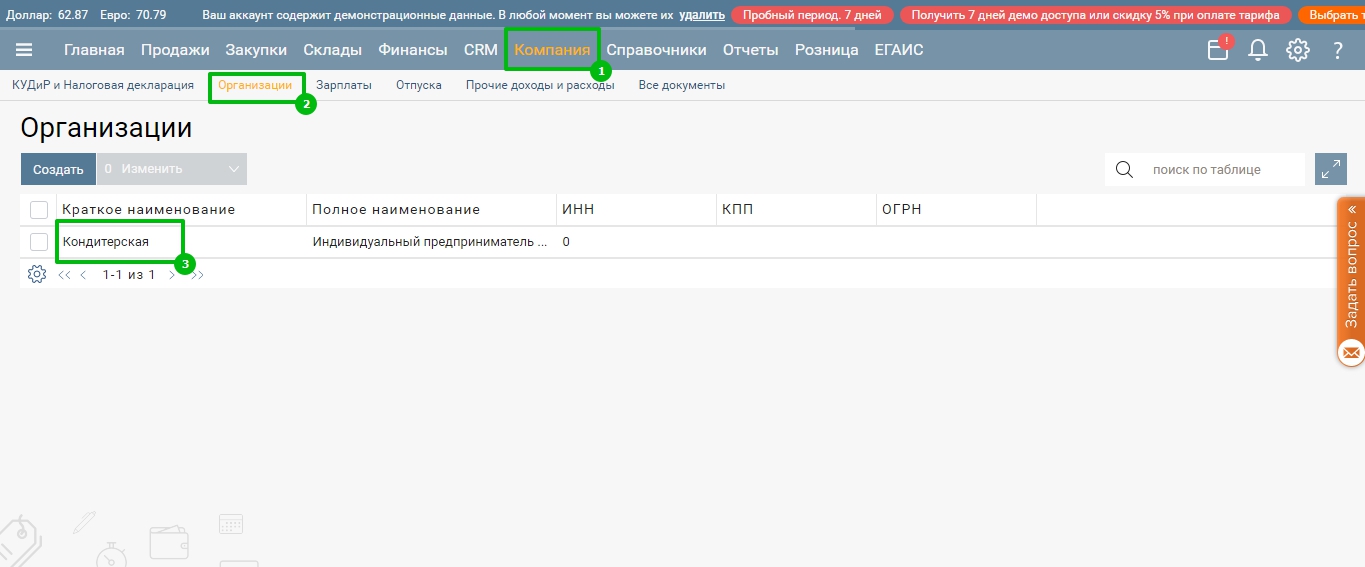

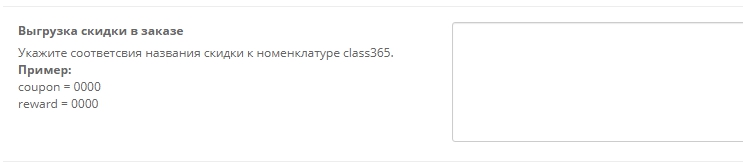
Unloading discounts in order
If you need to withdraw the discount in the order from the store to class365, you can specify in this setting the name of the discount code in the store and the corresponding product in class365 as a discount. On the side of class365, it is necessary to create a product for acceptance with the name “Discount”, this product will be in the order - it will mean a discount and it will be assigned the amount that will be deducted as a discount to the class. The product code in class365 can be obtained as follows:
- go to the goods

- Click the “External Codes” button

- Next, indicate how the discount code from the store and the product code in class 365 match. Example: coupon = 75936
Field from order for delivery note in class365
In this setting field, specify the name of the order field, which will be used as a note in the order class365. In class365 this field will be unloaded in a note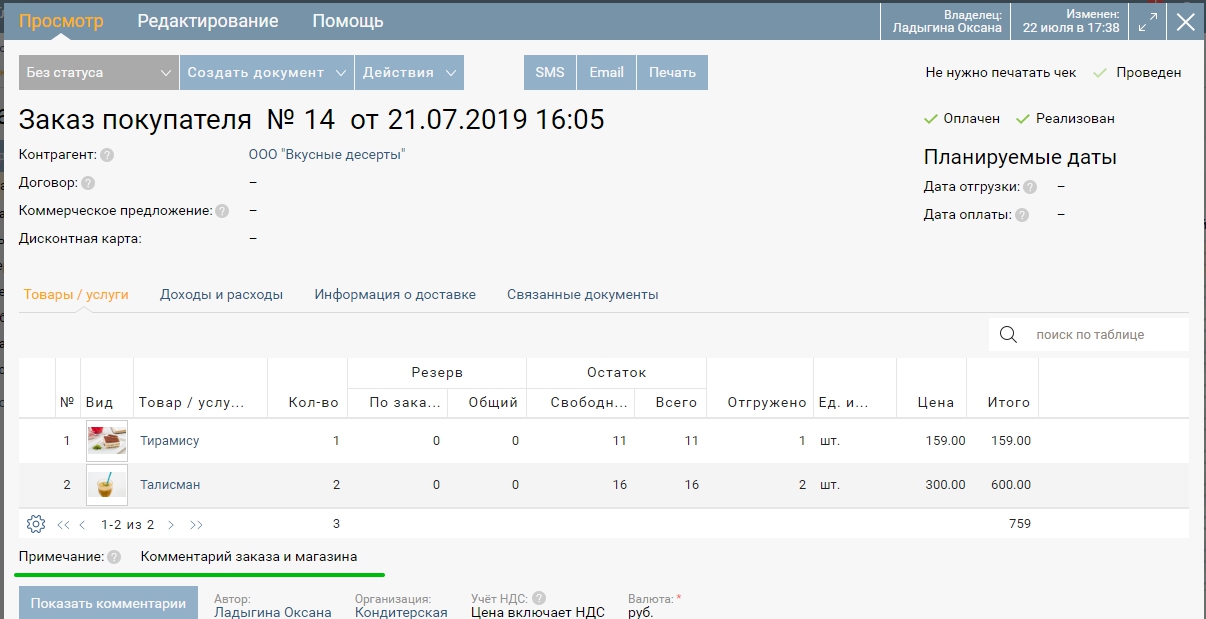

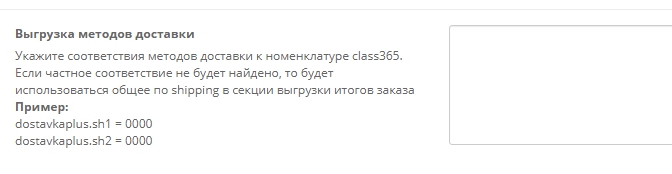
Upload shipping methods
An option that is responsible for unloading delivery methods as a product. For example, in Class365 you need to transfer the cost of delivery. In order to use this method of transfer, you must create a product in class365 that matches the delivery methods in the store. Next, you must specify the correspondence of the delivery code in the store to the product code in class365. Each delivery method with a new line.
dostavkaplus.sh1 = 0000
dostavkaplus.sh2 = 0000
The product code in class 365 can be obtained in this way

Categories
On this tab, you can configure the exchange of store categories and class365.jpg)
Category Sync
This parameter defines the exchange mode with Class365 categories. There are 4 modes:
- Disabled - In this mode, category sharing is disabled on both sides.
- Only in the store - This synchronization mode allows you to receive categories from class365 only in the store
- Only in class365 - In this mode, categories will be transferred only to class365 from the store. Categories are only created on the class365 side, in the future, changes to already synchronized categories will not be updated (for example, if you rename a category in the store to class365, such changes will not be transferred)
- Both in the store and in class365 - Exchange will work in both directions with restriction. First, all categories will be received from class365, and only new categories will be added from the side of the store, all changes to categories should be made only on the side of class365.
Initial status of new categories
This parameter allows you to set the status of the new category, if enabled, the new category will be immediately included in the store and available from the storefront.
This parameter must be disabled if you need to make additional category settings and manually enable it to display on the site before displaying the category.
Add new categories to the menu
This parameter allows you to automatically add new categories to the standard store menu, an important factor is that the standard system for displaying categories in the menu from open cards is supported, if third-party modules are used, categories may not appear, you need to manually configure the menu in a third-party module.

Force upload to a specific category
This setting allows you to upload categories from class365 to a specific one in the store. This allows you to divide the categories in the store received from class365 and internal categories. The related setting “Category for forced unloading” in it you can choose which category you want to unload from class365.
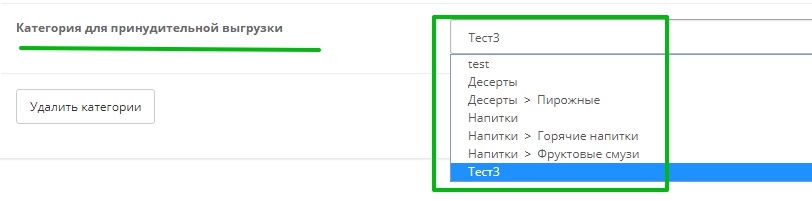
Delete Categories
The “Delete Categories” button allows you to quickly delete all categories in the store, regardless of the settings for forced uploading to one category - all categories will be deleted. In class 365, categories are not deleted.

Products
This tab allows you to configure the exchange of goods with class365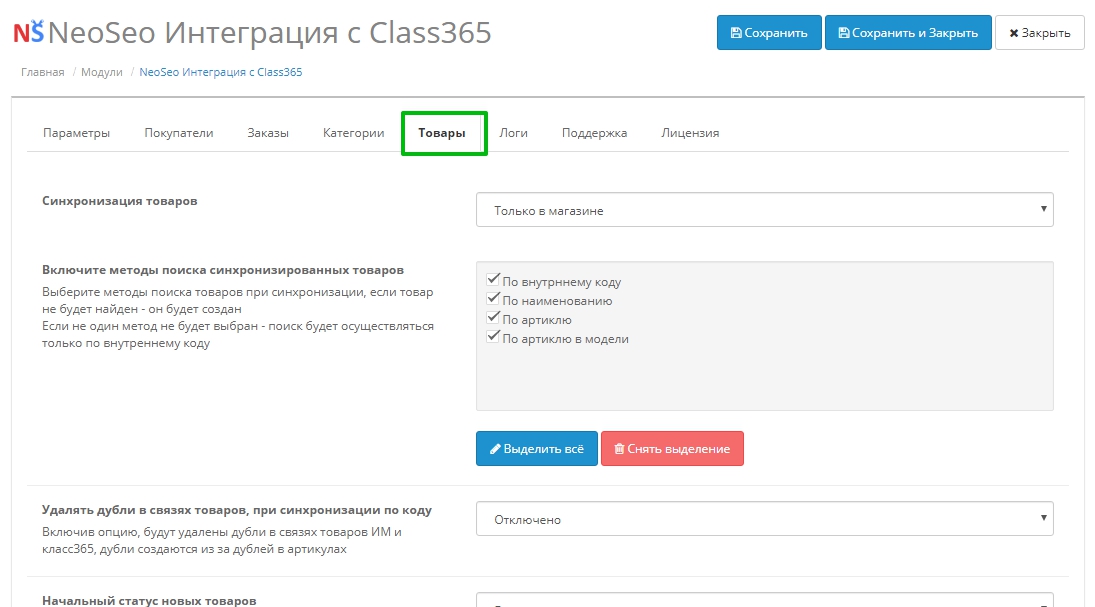
Product Sync
This parameter defines the exchange mode with Class365 goods. There are 4 modes:
- Disabled - In this mode, the exchange of goods is disabled on both sides.
- Only in the store - This synchronization mode allows you to receive goods from class365 only in the store.
- Only in class365 - In this mode, goods will be transferred only to class365 from the store. Goods are only created on the side of class365, in the future, changes to already synchronized goods will not be updated.
The following product parameters will be transferred from the store to class365:
- Name
- Description
- Model - in the field the article in class365
- Weight
- Category Binding
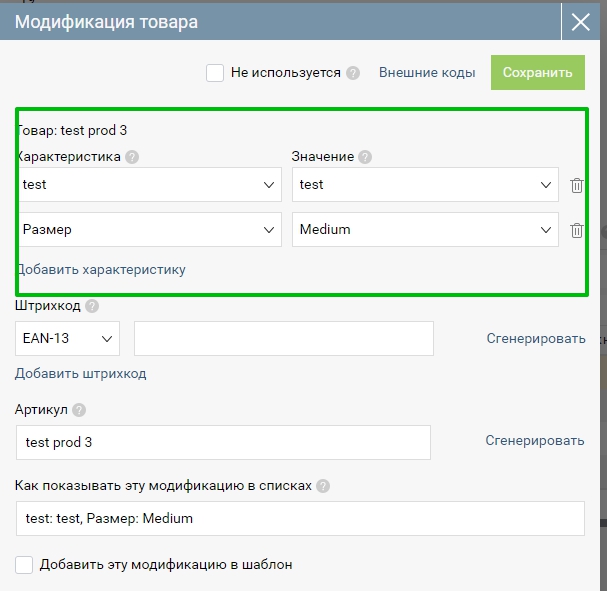
- Options - modifications to products in class365
- Related options will be created in class365 as normal options
- Both in the store and in class365 - Exchange will work in both directions with restriction. First, all products will be received from class365, and only new products will be added from the side of the store (with parameters as with the mode only in class365), all changes to goods should be made only on the side of class365.

Turn on synchronized product search methods
This parameter allows you to choose how to search for products in the store when receiving goods from class365. This parameter will compare products of class365 and the store in order to link them.
There are 4 ways to search for products:
- By internal code - the search is performed on a synchronization card with class365, this card is created during the first synchronization of goods, the internal code is received by the store from class365 and associated with the product ID in the store.
- By name - the search is carried out only by the name of goods from class365 to the store.
- By article number - the search goes through the sku field (article in the store) and is compared with the article field in class365
- By article in model - the search goes through the model field (module in the store) and is compared with the article number in class365
If the product is not found in the store using these search methods, a new product is created in the store. 
Delete duplicates in product links when synchronizing by code
This parameter is necessary for regulating duplicates in the relations of store goods with goods from class365. If goods were previously synchronized, for example, according to the article and there were duplicates in the goods of the stores, which leads to duplicates in the goods communication card. Then the problems were fixed, but there were duplicates in the map, then you need to use this option to remove duplicates from the map.
Initial status of new products
This setting sets the status for new products from class365 in the store. If you need additional settings for the goods before you can publish them in the store, you must disable this option. If the option is enabled, the goods after being added to the store will be published automatically to the storefront.

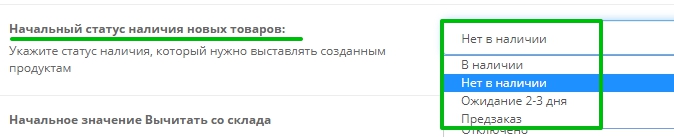
The initial status of the availability of new products
The option allows you to specify the status of the availability of goods when it is not in stock in the store when creating a new product. In the setup, options from opencart statuses will be presented.
Initial value Subtract from stock
This parameter indicates the initial value “Subtract from stock” when creating a new product in the store.
Import product analogues
This option allows you to activate the unloading from class365 of product analogs, fill in the links of analogues to the shipped product.
In class365, analogues are filled in the product card on the analogues tab:
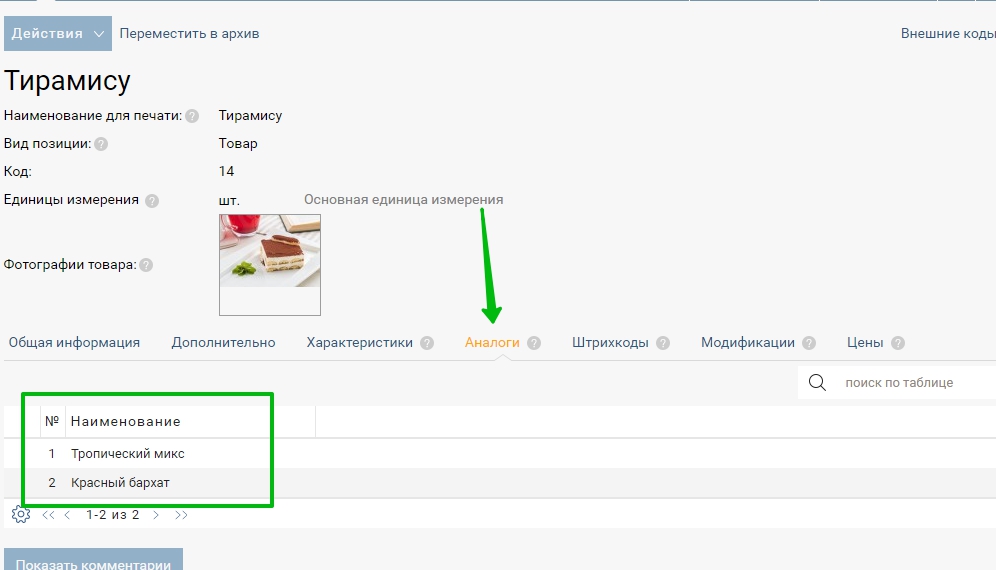
There are two unloading options for this option:
- Add analogues but do not delete - New analog links will be added, but old ones will not be deleted
- Full import of analogues - analogues will fully comply with class365

Field Product / Barcode
For this option, you must specify the product field from the product table of the store - where to write the barcode field from class365 
Fill in parent categories
If enabled, then the product will be assigned all categories from the current to the root. Otherwise, only the lowest level category in the store will be installed.

Exclude categories on import
This option allows you to ignore the categories and products included in them when importing from class365. These products and category will not be added to the store. The name of the categories must be indicated on a new line.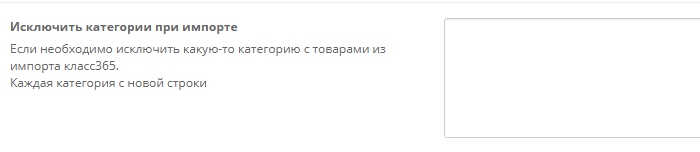
Update Description
In this option, it is possible to disable the update of the description, in the goods in the store the description will not be updated.
Update images
This parameter is responsible for updating images in the product card in the store, if there is no image in class365 then the image is deleted in the product in the store.

Update full images
This parameter is necessary to regulate the time when it is necessary to completely update the synchronized image goods.
This option is necessary to solve the problem when the image in class365 has changed but the name of the file itself has remained the same, thus during the exchange such images are skipped to speed up synchronization.
There are 3 options available for this option:
- Once a day
- Once a week
- Once a month
The option is activated by server time from 00:00 to 05.00, if a full exchange has been started at this time.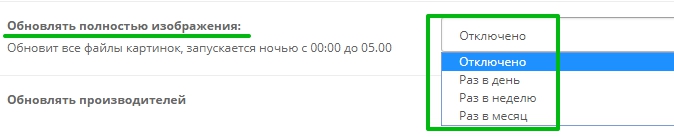
Update manufacturers
This parameter allows updating manufacturers in a store product from class365
Name of attributes that can be interpreted as Manufacturer
In class365 there is no parameter in the product as a Manufacturer, this parameter is created as a property for the product and can have an arbitrary name or several.
In this parameter, you must specify the name of the fields from class 365 from the properties of the goods where the manufacturer is indicated.
Update Attributes
This option allows you to enable adding / updating the attributes of goods in the store from class365
Take into account additional fields in the product card as an attribute
In class365 there is an opportunity, in addition to attributes, to create separate universal fields, with this parameter it is possible to accept these fields as attributes, and such fields can also be accepted as a producer.
In class365, such fields are created in the product card here: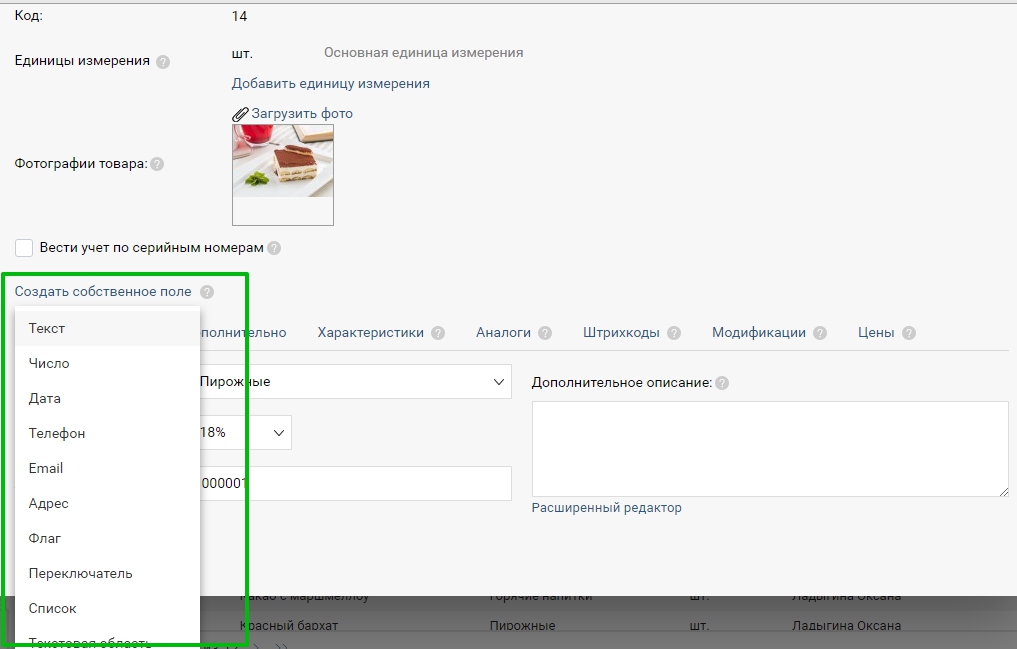
Clear article field if empty
This option is necessary if the article is deleted in class365 and must also be cleaned in the store.
Update filter
This option should be used if the ocfilter module is installed in the store. When using this parameter, the filter for this product will be updated.

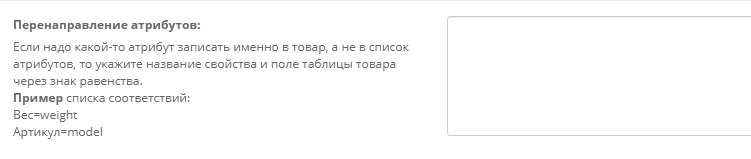
Attribute Redirection
This option is needed if you need to write the parameter for the product in the general table product, instead of adding it to the attribute. Such attributes will not be added to store attributes only in the specified field.
Each attribute attribute - the field must be indicated on a new line with an equal sign.
Example:
Weight =weight
Code =model
Using connected options
This option should be used if the Linked options module is installed in the store. This function will use the module related option to add to the system
In class365, related options are created in this way:

Using linked images for options
This function, as well as with related options, uses a separate module for related image options. 
Option Price
This parameter sets the method for updating the option price and product price.
Options:
- As is - with this option, the site should have an additional module that allows the options to assign the price as is, i.e. with an equal sign. This functionality is not included in the standard opencards and in the exchange module with 1s.
For example, the product has options: blue - 100 hryvnia, red - 150 hryvnia. Thus, the product will be assigned a price of 0, and the options are 100 hryvnia and 150 hryvnia, respectively.
- The product has a minimum price, plus options for it - the most optimal option and the most often used. The product will be assigned the price of its minimum option, and all options will have a price with a plus sign.
For example, the product has options: blue - 100 hryvnia, red - 150 hryvnia. Thus, the product will be assigned a price of 100, and the options are +0 hryvnia and +50 hryvnia, respectively.
- The product has a maximum price, options minus it - the product will be assigned the price of its maximum option, and all options will have a price with a minus sign.
For example, the product has options: blue - 100 hryvnia, red - 150 hryvnia. Thus, the product will be assigned a price of 150, and the options -50 hryvnia and +0 hryvnia, respectively.

Article field option
If you use an additional field for the article in the option, you must specify the name of this field from the database table “product_option_value”. The article in the options is not a standard function for opencards.

Barcode field in option
If you use an additional field for the barcode in the option, you must specify the name of this field from the database table “product_option_value”. The barcode in options is not a standard feature for opencards.

Option required
The setting responsible for the mandatory choice of options when ordering. Turn it on so that the buyer cannot place an order without selecting the product option.
Type of options
The setting that is responsible for the type of option. Only the two types that are most popular are supported. This is a drop down list and a radio button. 
Update balances
This parameter allows activating the update of balances from class365. If disabled, product balances will not be affected. Also, balances will be recounted from the options.

Update prices
This parameter allows you to activate price updates from class365. If disabled, product prices will not be affected. Also, prices will be recalculated from the options.
Type of paged price
A description of the operation of this parameter can be found here:
Link to the article https://neoseo.com.ua/kak-ukazat-neskolko-cen-dlya-tovarov

Remove items
This button allows you to delete all products from the store without exception.
Remove manufacturers
This button allows you to remove all manufacturers from the store without exception.
Remove Attributes
This button allows you to delete all attributes from the store without exception.

Delete options
This button allows you to delete all options from the store without exception.

Unload goods
This button allows you to quickly get all the goods of the store in xlsx format in the form of a zip archive. All store options are also unloaded separately.


We hope You find this article helpful.
Always happy to help
NeoSeo Team.


